
Step 1
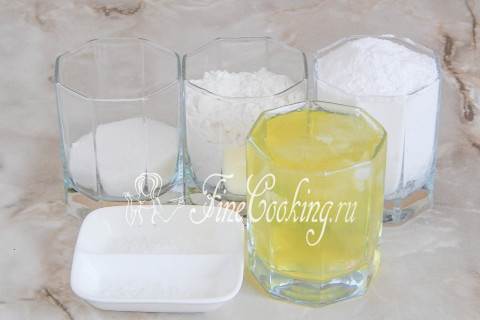
To prepare angel sponge cake with egg whites, we need chilled egg whites, granulated sugar and powdered sugar, wheat flour, a pinch of salt and a little citric acid (I used it in the absence of lemon juice, which you need to take two teaspoons).
Step 2
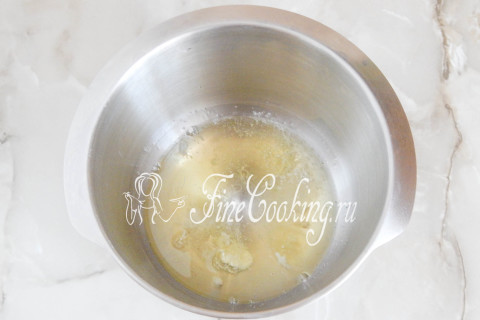
Let's get started, I guess. Take a large bowl, pour the chilled egg whites into it, add a pinch of salt and citric acid (or lemon juice). We begin to beat everything at medium speed to destroy the structure of the protein. When a large foam appears and the whites turn white, we begin to gradually add granulated sugar. Beat everything at high speed until soft peaks form.
Step 3
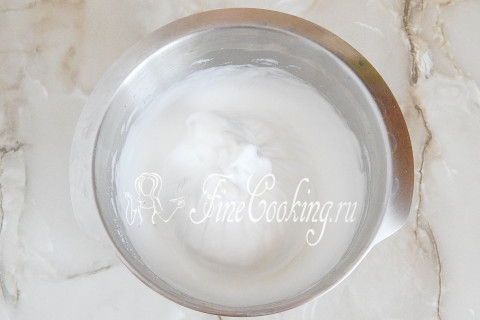
Such proteins, if you turn the bowl over, do not spill out and do not even try to slide down.
Step 4

Now you need to add wheat flour and powdered sugar, which we previously mixed and sifted. Mix the dry mixture with a spoon or spatula using upward movements through the bottom into the walls. Neat, but clear.
Step 5

The dough turns out very airy and fluffy.
Step 6
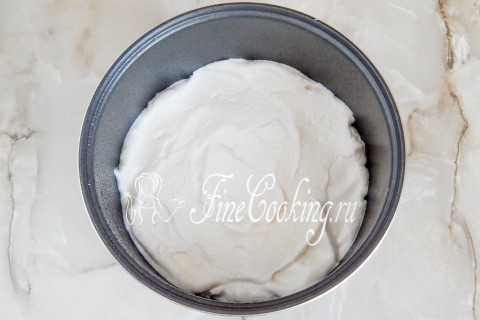
Now take either a non-stick baking dish or a multicooker bowl. Lightly spray the walls and bottom with water from a spray bottle. Lay out the dough and level it. If you have a form with a hole, skip the next step.
Step 7
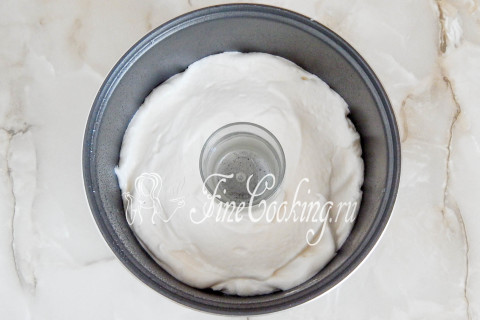
Now take a glass and insert it exactly in the center to the very bottom of the mold. Here's a hint: before preparing the dough, decide on the choice of glass. In a multicooker, the lid may not close if the glass is too high.
Step 8
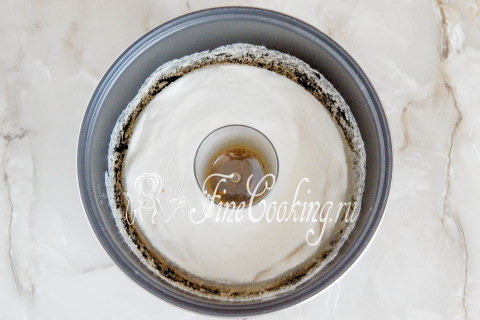
We bake the angel sponge cake in a multicooker on the Baking mode for 60 minutes (if your appliance is more powerful, 45-50 minutes may be enough). Bake the biscuit in the oven for 35-40 minutes at 180 degrees. As planned, the finished sponge cake should fit snugly against the walls of the mold, but mine decided that it would be good for it to move away from them. And here I have a dilemma: how to turn the bowl over if the whole structure is so outwardly unstable. It seems that when you turn it over, the biscuit will fall out onto the table along with the glass (besides, the glass is quite heavy). Ah, it was not!
Step 9
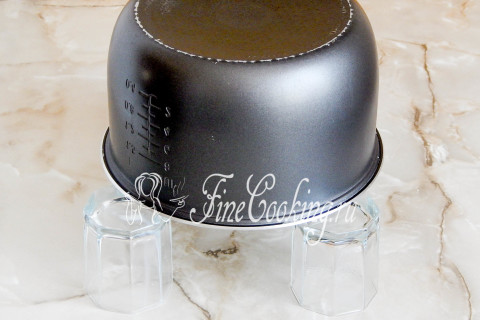
We turn this entire structure onto inverted glasses and let the baked goods cool completely in this position. From time to time I came up and tried to look inside to see how my biscuit was doing. He hung there and didn’t even think about falling out!
Step 10
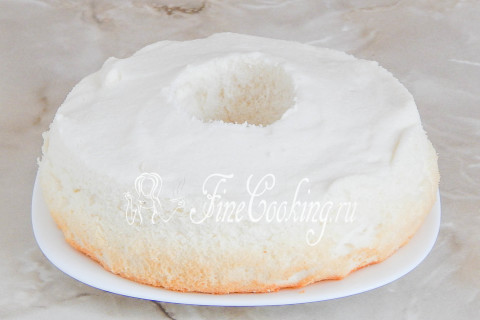
Now you need to take out the biscuit so that it remains beautiful and appetizing. Turn the cooled pan over again. We take the glass and carefully draw it along the walls (of the glass) with a thin knife. Now we also carefully scroll the glass along the bottom — you will see how the biscuit begins to peel off from the mold. Now you can pry the baked goods a little with a silicone spatula to make sure that it no longer sticks to the walls and bottom. Turn the mold over and remove the biscuit.
Step 11
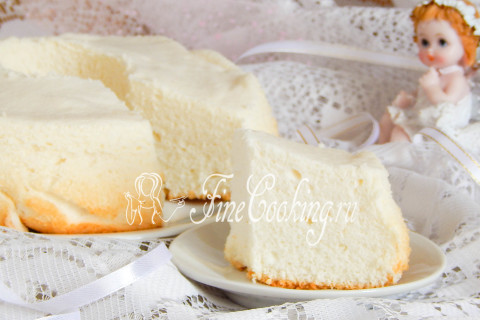
It turns out very tender and tasty. And what kind of cake can you make….probably also angelic!