Detailed step -by -step recipe with photo: Step 1
-
Prepare the ingredients in advance: oil and eggs should be removed from the refrigerator in 2-3 hours. The recipe uses C0 eggs, but they can be replaced with C1. For a cream, take 1 more yolk more, and use 2 eggs for the dough.
Tip: If the butter 82.5-83% of fat was not in the store, then you can use 72-73%. But with it the cream will turn out to be more liquid and difficult to work. In this case, I advise you to add 20-30 g of flour more.
In general, cottage cheese cake is prepared from available products that are absolutely found in any store. Vanilla essence can be replaced without problems. For example, vanilla sugar — 15-20 g. Vanilin will give a different flavor to the cream, but in extreme cases it is also suitable.
-
Step 2
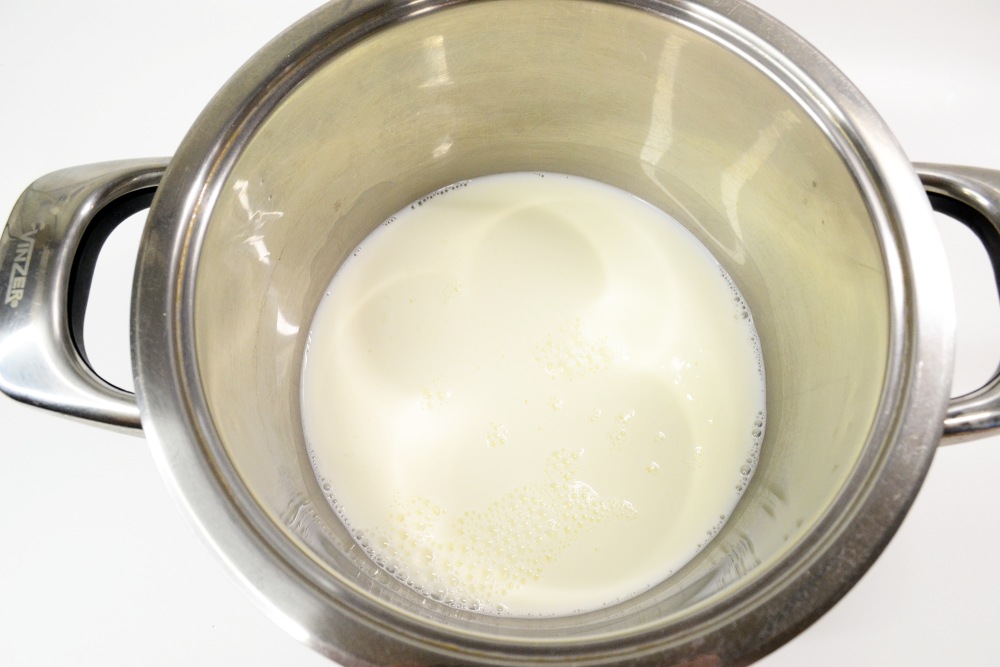
Start with cooking custard. Pour most of the milk — approximately 400 ml — into the saucepan in which the cream will be cooked. Put on the stove and heat over medium heat (3/6 for electric). But do not boil!
-
Step 3
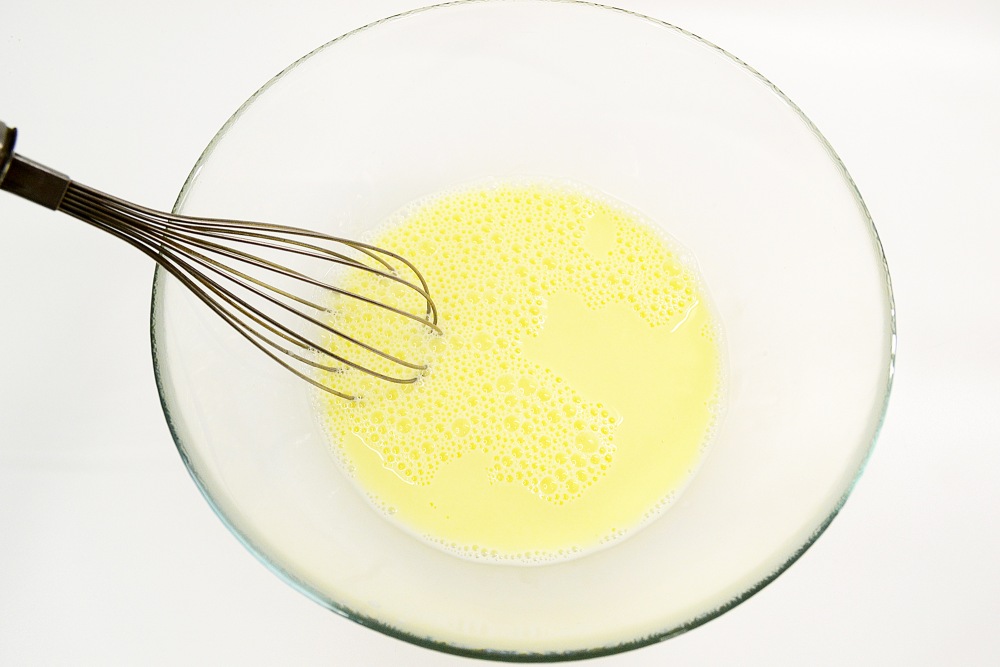
Mix yolks with the remaining part of milk with a whisk or mixer until a homogeneous consistency.
-
Step 4
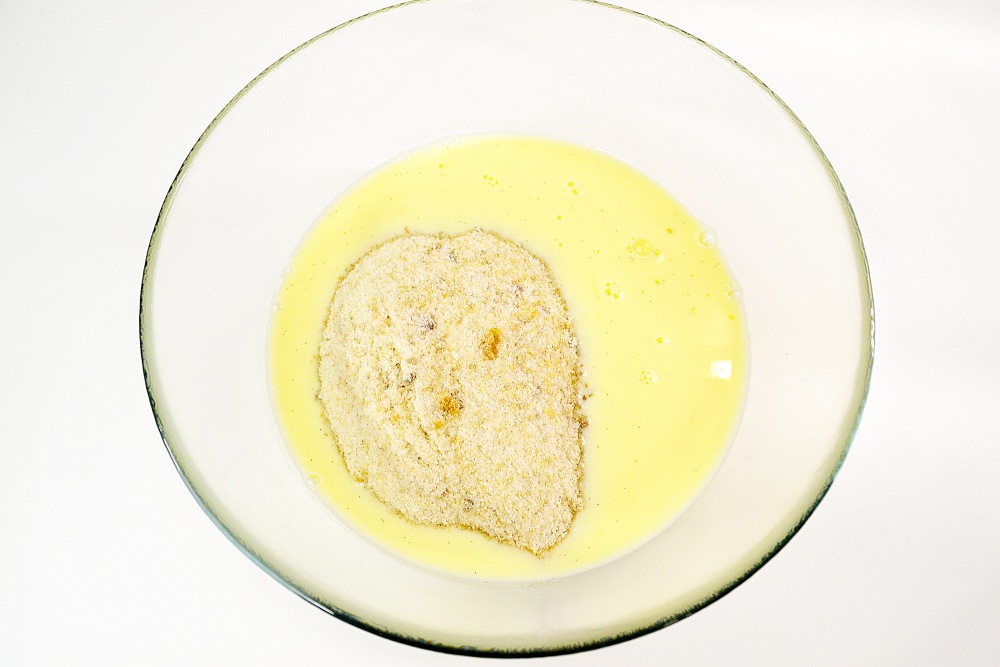
Add flour, vanilla extract, sugar, a pinch of salt and mix thoroughly again.
Watch the master class «How to spend in the kitchen no more than 1 hour a day and at the same time it is good and useful to feed» 👉🏻 here
-
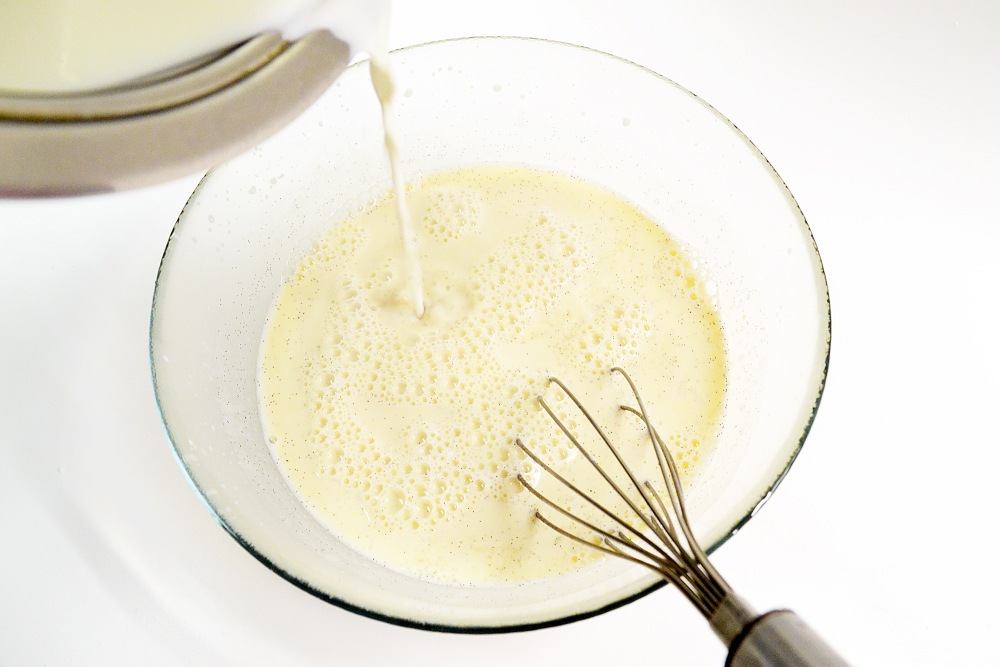
Step 5
Without ceasing to stir, pour in a thin stream heated milk.
Tip: It’s time to remove milk from the stove when a noticeable steam appears, but there will be no signs of a boil yet.
-
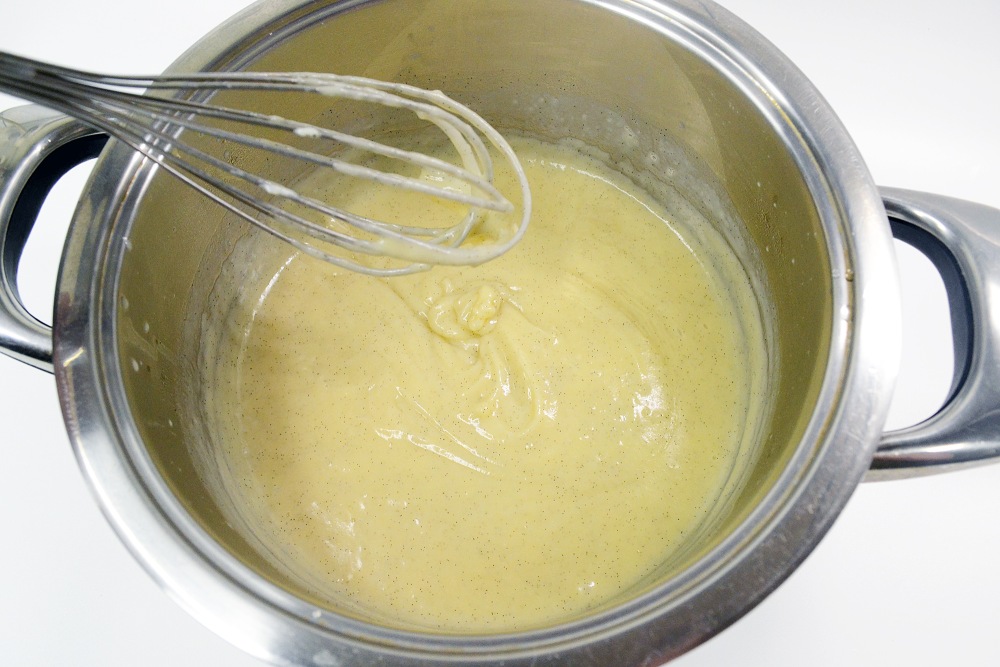
Step 6
Pour the mixture back into a saucepan and return to the stove. Cook on fire just above the average, constantly stirring. When the cream begins to thickens and act on the bottom more actively, reduce the fire to a small one and cook until large bubbles begin to appear-for about 7-10 minutes.
-
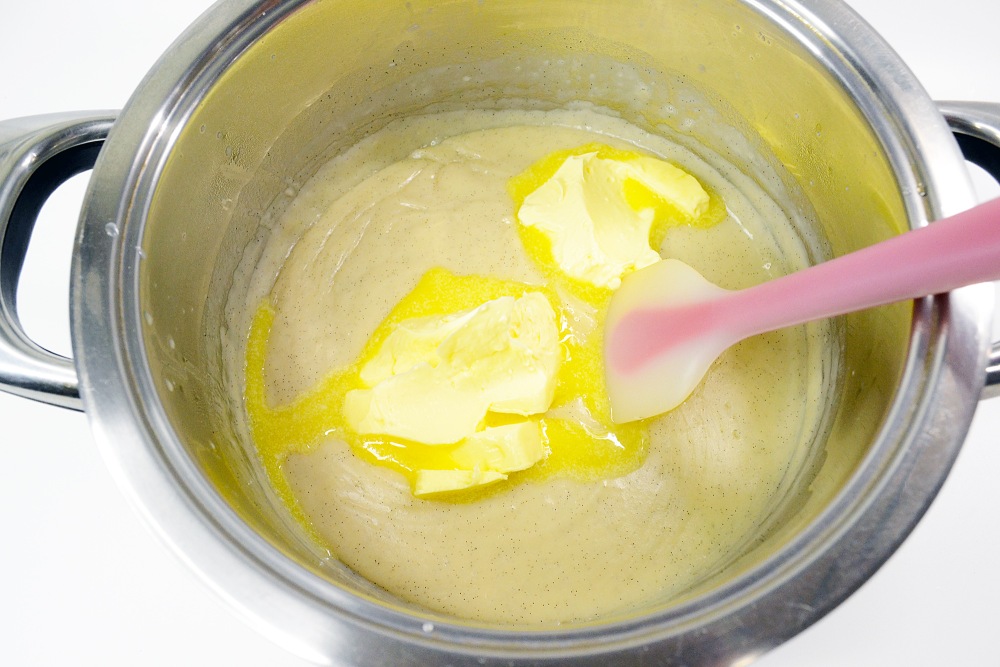
Step 7
Turn off the plate and add butter at room temperature to the cream. Stir thoroughly.
-
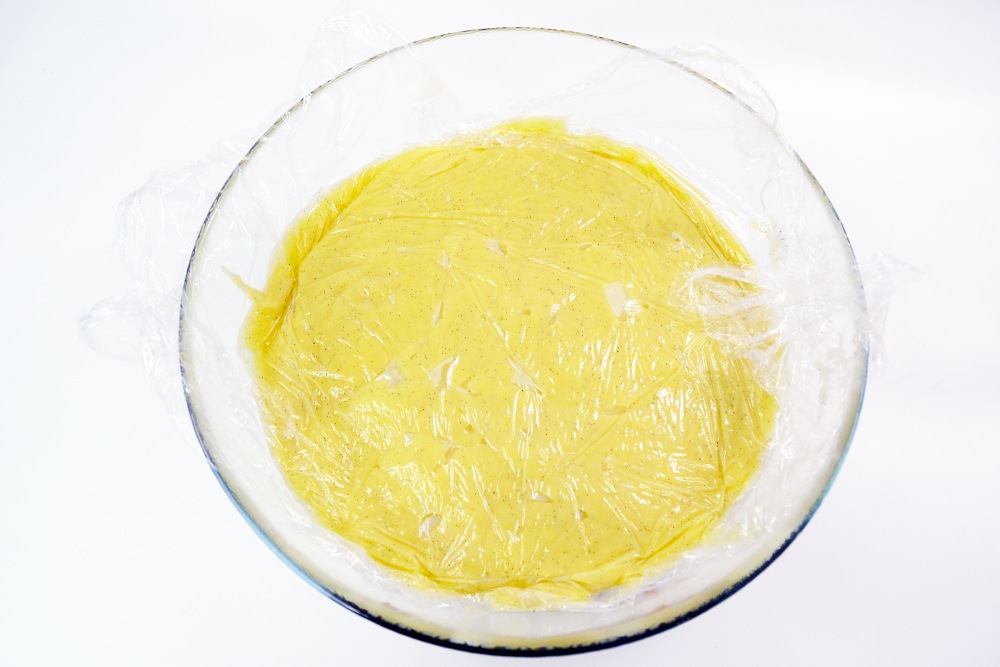
Step 8
Transfer the cream into a separate bowl to cool faster. Cover the film “Contact” — so that it is in contact with the cream and leave no voids. Cool the cream. You can immediately put in the refrigerator. But I strongly recommend cooking it in advance, at least in 7-8 hours.
Important: cover will protect the cream from the formation of a viscous milk film, which will have to be removed and thrown away.
-
Step 9
Start cooking cakes. In a bowl, connect the egg and 1 yolk, cottage cheese, sugar and a pinch of salt. Grind with a submersible blender until a homogeneous consistency.
Tip: you can use a combine with a universal knife or a nasading-sinter for faster and more convenient mixing of cottage cheese. It was they who used it.

-
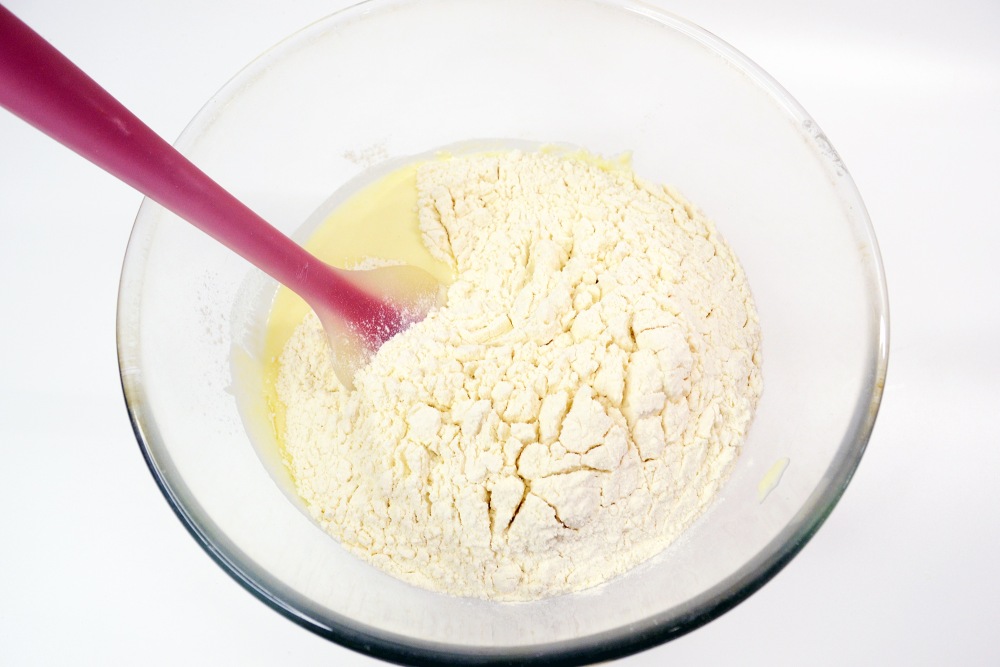
Step 10
In 2-3 entry, add flour to the mixture. First mix everything with a spatula.
-
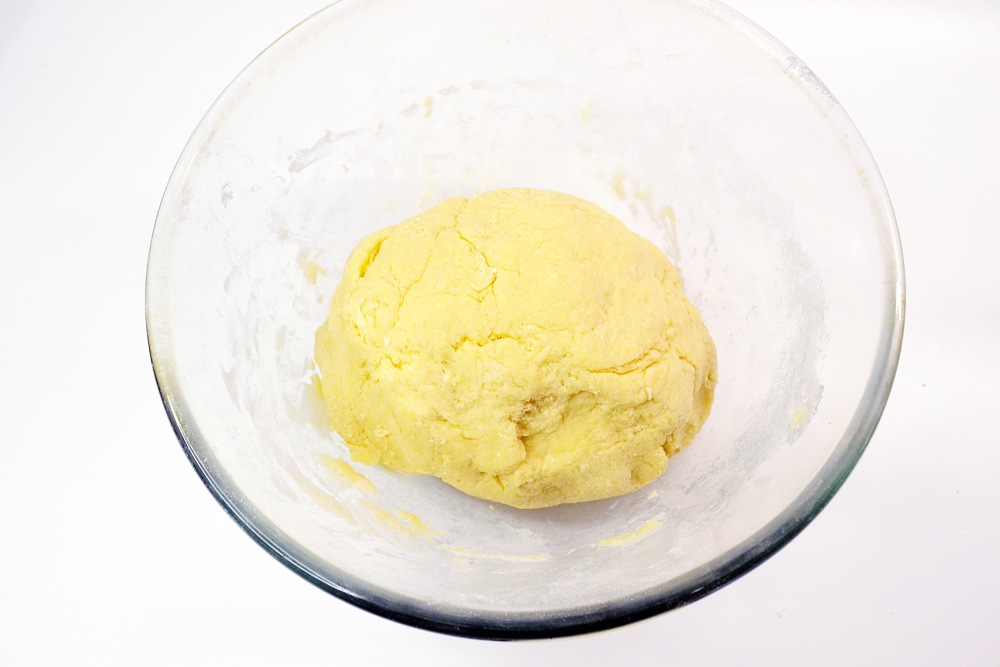
Step 11
Then knead the elastic dough with your hands, which does not stick and holds the shape well.
-
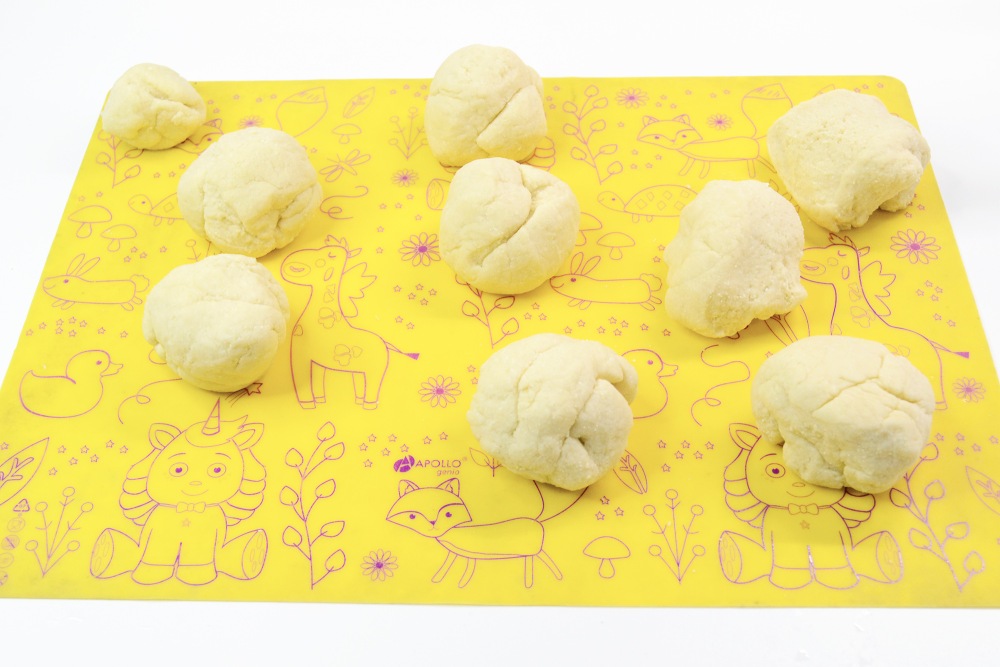
Step 12
Divide the dough into 8 parts — I got 880 g, I made pieces of 100 g. The ninth will go to sprinkle the cake.
-
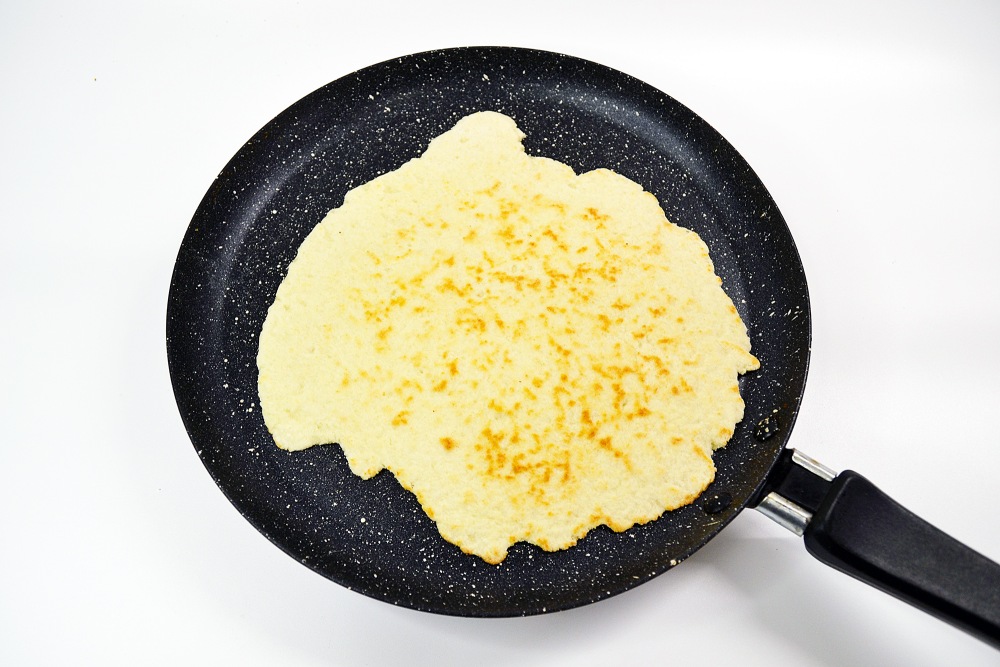
Step 13
Put the pan to heat on the maximum fire. Sprinkle the working area with flour, roll out 1 ball of dough under the diameter of the pan as thin as possible — approximately 3 mm. I use pancake pans 22 cm, but the circles turned out to be smaller diameter (20 cm). In the process of cooking, the dough is still “cringing”. It should be borne in mind that then the blanks will be cut into a single shape.

-
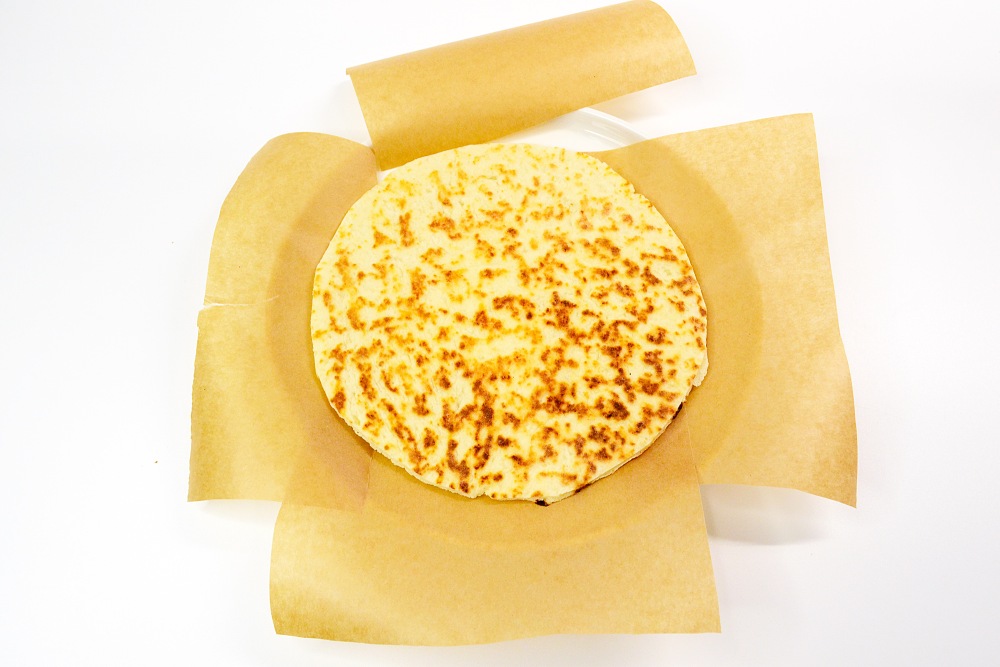
Step 14
Reduce the fire of the stove a little (I put 5/6 on an electric burner). Fry the workpiece for 3 minutes on the one hand and 2-3 minutes on the other. Roll and fry the rest of the «pancakes».
-
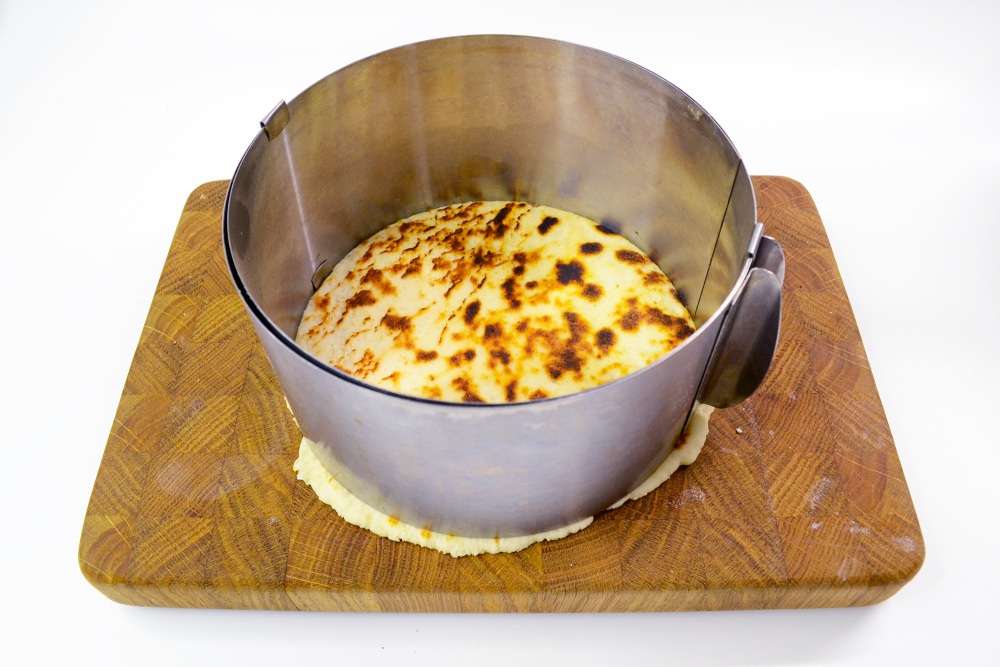
Step 15
Submit on cakes a stencil for alignment: attach and press a culinary ring or plate with thin edges.
-
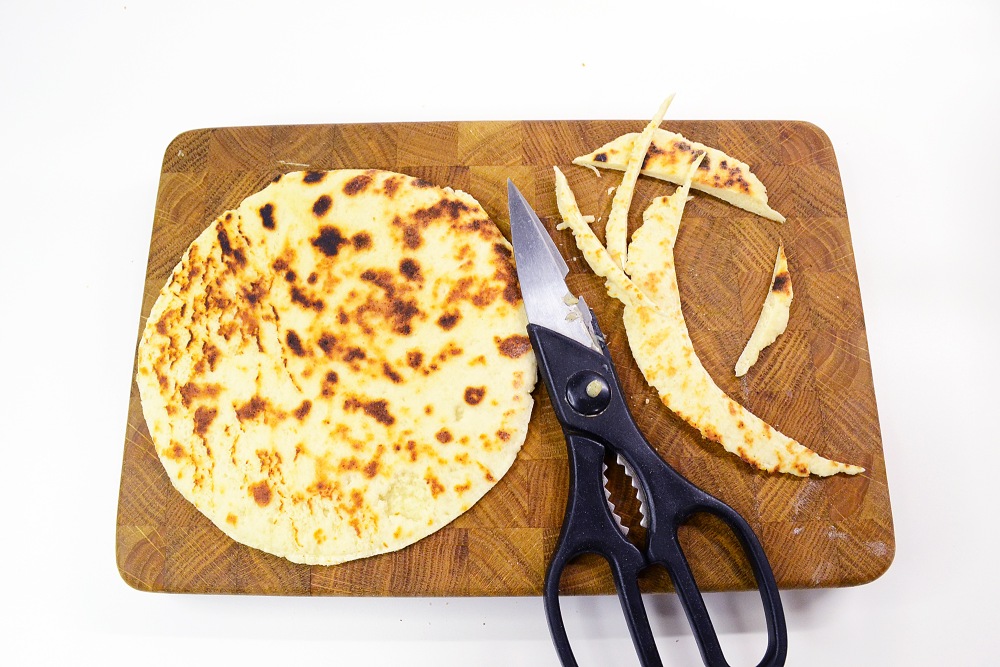
Step 16
Cut each blank with a knife or kitchen scissors. The cakes are quite soft, it is easy to do it.
You may be interesting:
Cakes with condensed milk: 10 simple recipes
-
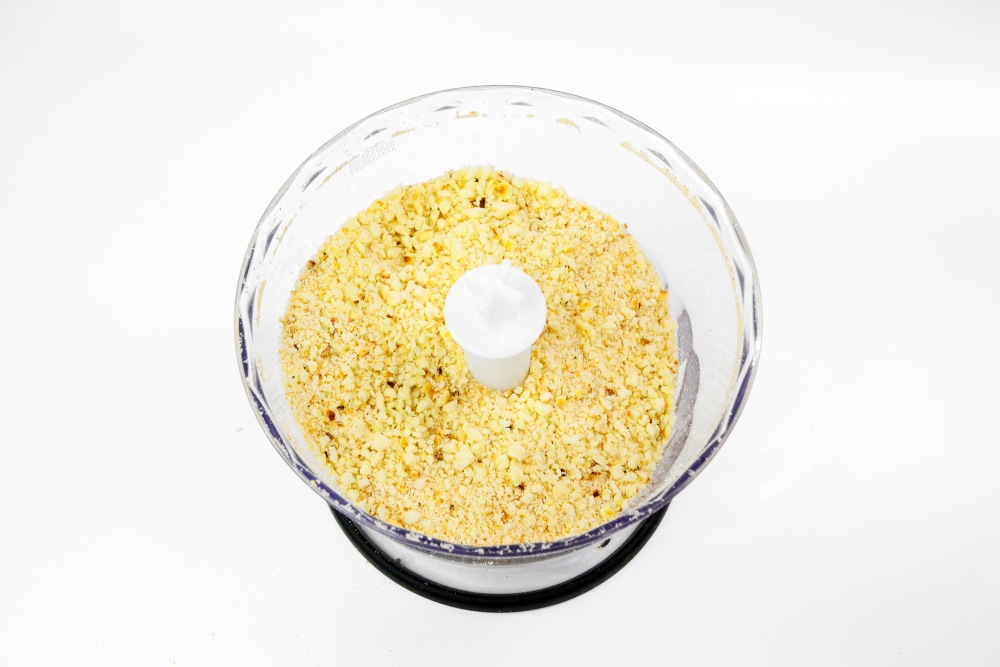
Step 17
Grind the remains from the cakes in a blender. Send the 9th, the smallest cake there.
-
Step 18
Put in the center of the plate on which the cake will be assembled, a little cream so that the first cake does not slip.
-
Step 19
Put the cake on top, press a little. Under it, put segments of parchment from 4 sides. So the curd cake will look more neat after the formation.
-
Step 20
Transfer the cream to a confectionery bag. You can lay it out with a spoon, but such an accessory greatly simplifies the process.

-
Step 21
Put the cream on top of the first cake. You can not level, it is already quite gentle and fluent. I took advantage of the spatula to make the layers a little even more.

-
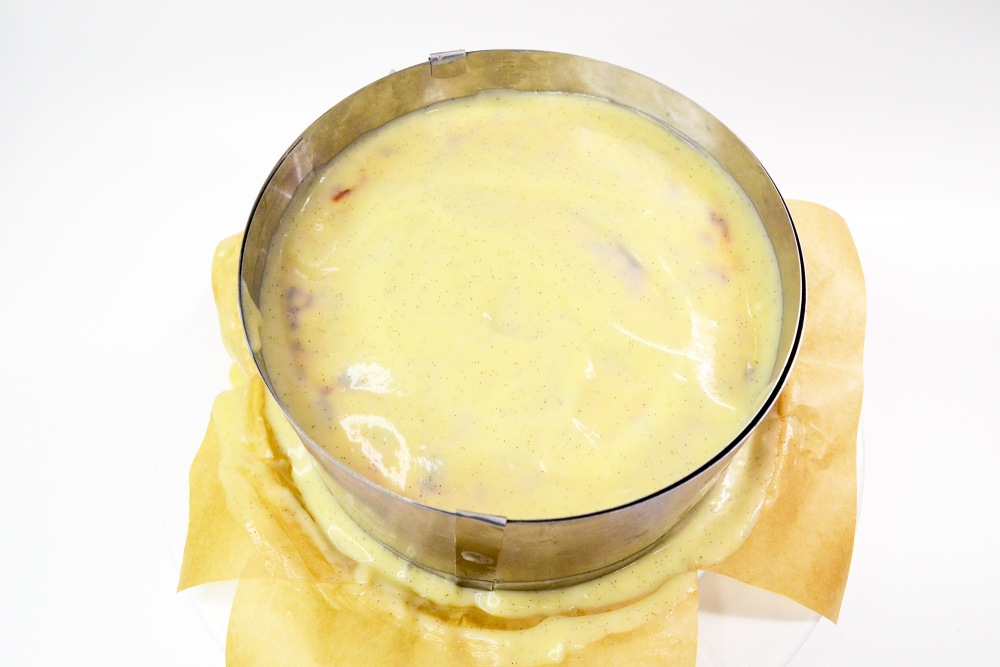
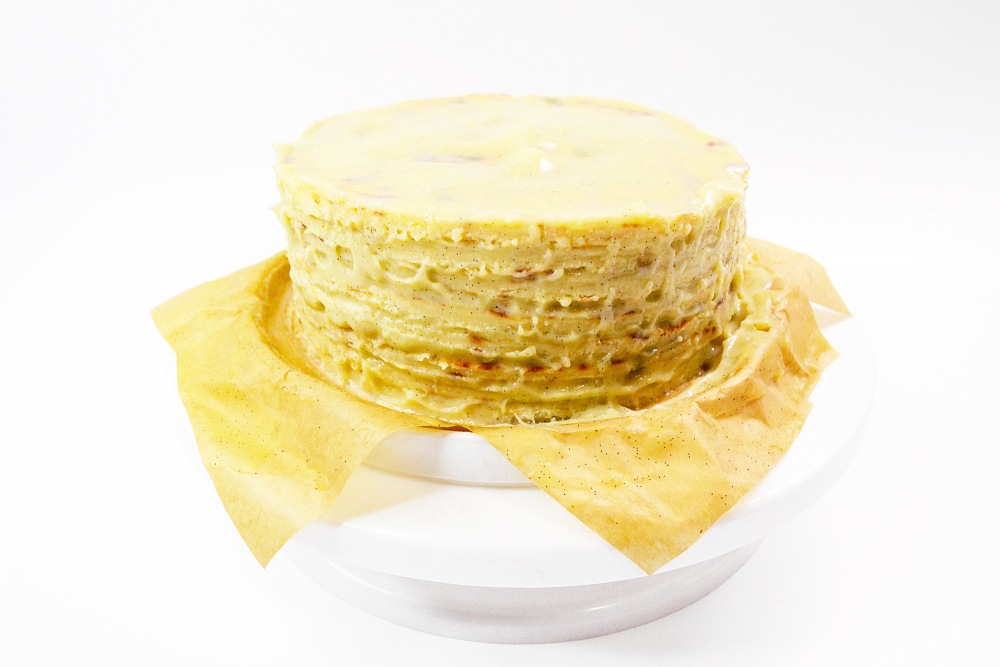
Step 22
Cover with the second cake. Repeat the layers with all the cakes. For convenience, you can install a confectionery ring so that the layers do not leave. Complete the assembly of the curd cake with a layer of cream.
-
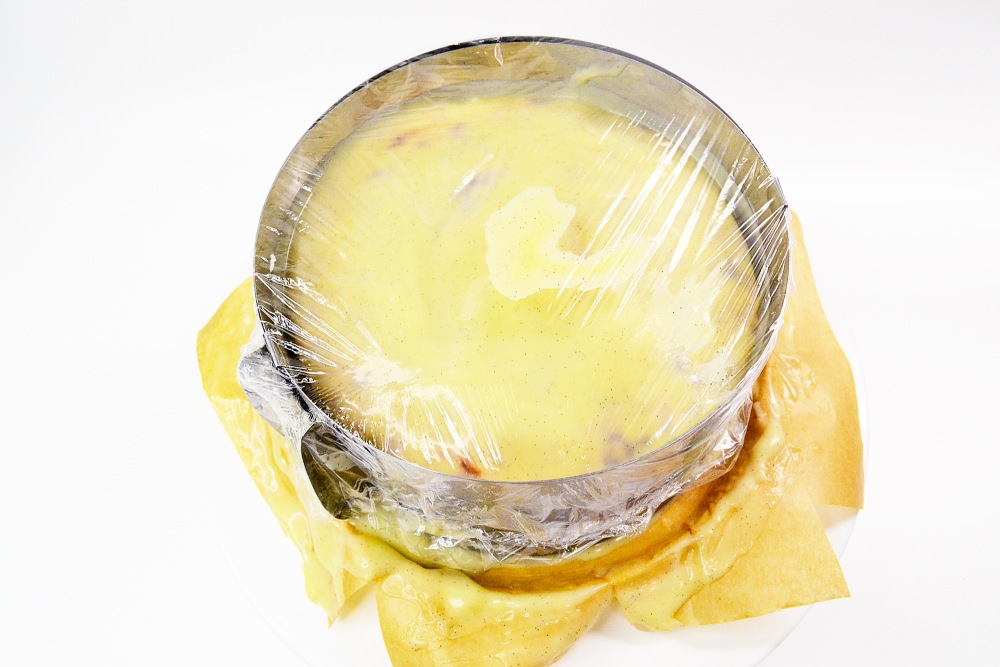
Step 23
Cover the ring from above with a film and remove the cake in the refrigerator for at least 5-7 hours. The cakes should be saturated and “grasp”.
Important: the film is located above the surface of the cake, does not come into contact with it.
-
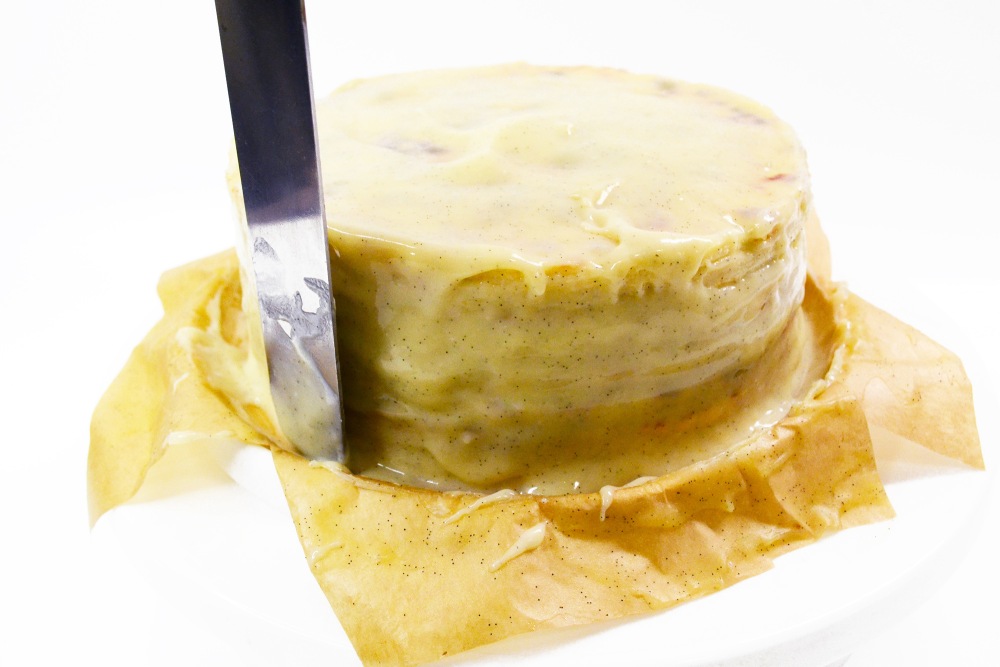
Step 24
Get cake, remove the film and ring. The cakes have become even softer, and the structure is more stable.
-
Step 25
Remains of the cream, cover the sides of the cake so that the baby is better stuck.
-
Step 26
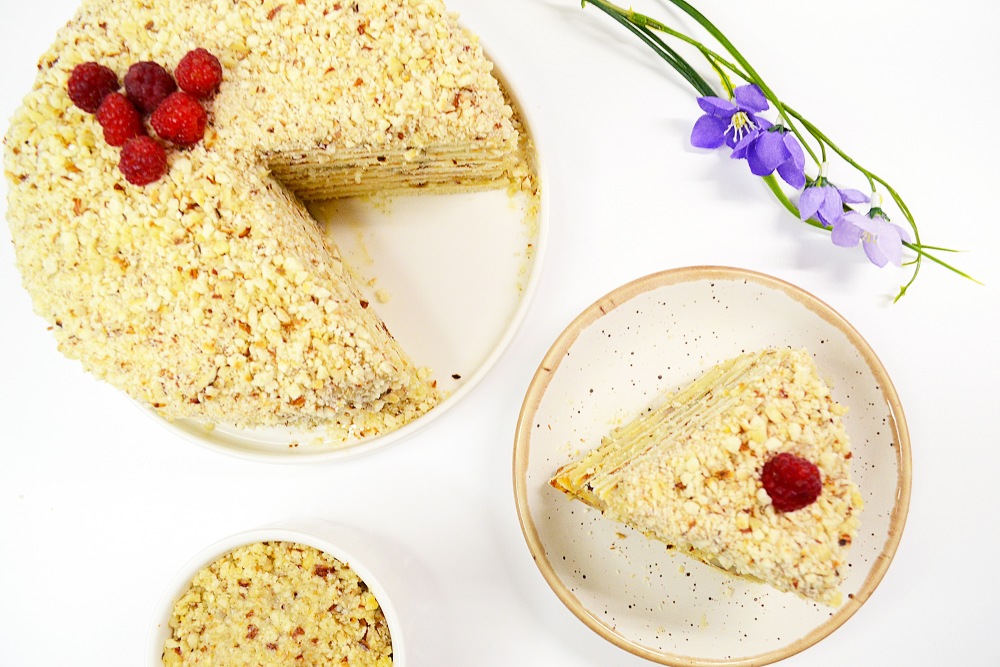
Sprinkle the top of the cake and side with a crumb of cake residues. You can add crushed nuts to it. I used hazelnuts.
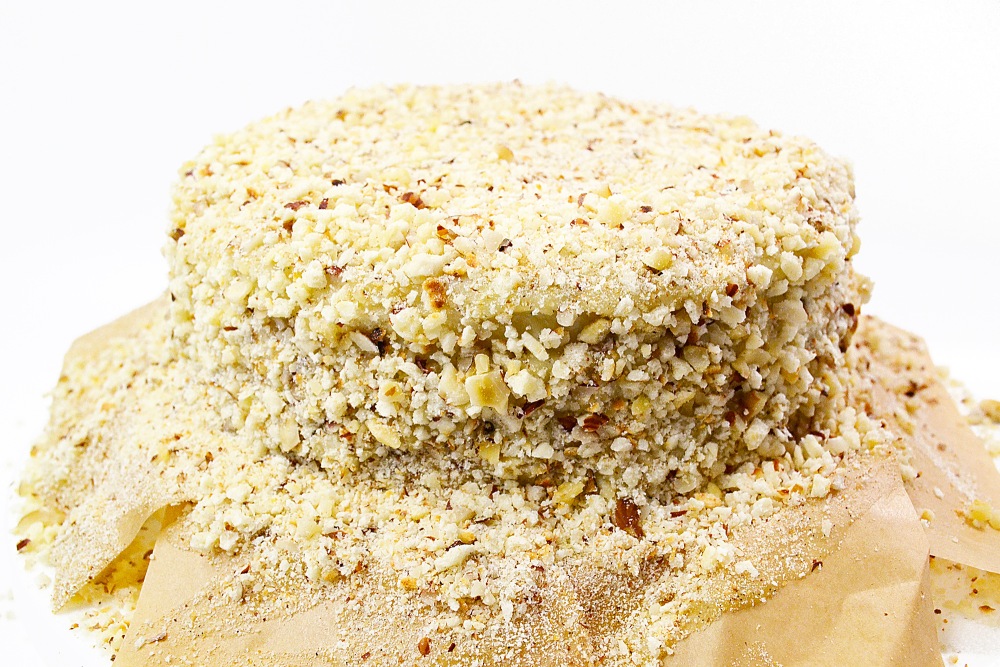
-
Step 27
Shake the remains of sprinkling from the plate and remove the substrate from parchment.

-
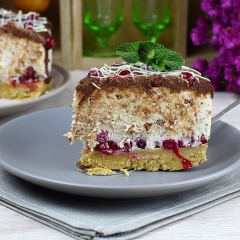
Step 28
The home -made curd cake is ready. You can cut and serve to tea or coffee. The cream turned out to be very tender, so you should not keep the cake for a long time.
Nice tea party!
📌 Do you like homemade baking? Look at ours A selection of cakes With photos and step -by -step recipes — from the classic «Napoleon» and the honey to the simple biscuit and cottage cheese cakes without troubles. There are ideas for the holiday and for cozy tea drinking with the family.