Detailed step-by-step recipe with photos: Step 1
-
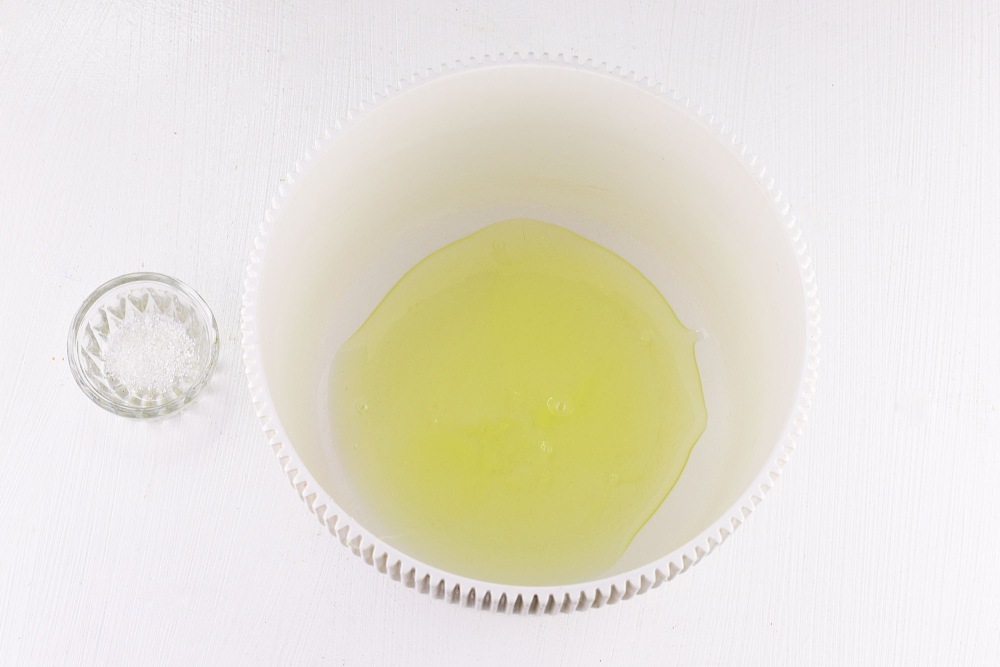
Prepare the necessary ingredients for the recipe for New Year's meringue Christmas trees on a stick.
The whites should be at room temperature to whip better. If the eggs have just been removed from the refrigerator, let them sit at room temperature for about 20-30 minutes. When separating the white from the yolk, it is important that not a single gram of yolk gets into the white, otherwise the whites will not beat as needed.
For the meringue in this recipe, I recommend using fine-grained sugar. It dissolves easily in the protein, which is important for obtaining a stable and smooth mass that will hold its shape when whipped. Sugar can be replaced with powdered sugar. Powder dissolves much faster than regular sugar, which helps avoid sugar crystals in the meringue, making the texture smoother and more uniform.
Salt helps stabilize proteins, improving their ability to hold their shape. It helps strengthen the structure of proteins, which allows them to form a denser and more stable foam when whipped. This is important for the meringue so that it turns out light, but does not fall or lose its shape. Salt slightly reduces excess sweetness, giving the meringue a more balanced taste. This is especially important when large amounts of sugar are used, as is the case with meringues.
Citric acid helps stabilize egg whites while beating, preventing them from overbeating. It slightly changes the pH of the environment, which helps proteins form a stronger and more stable structure. Without this component, the proteins may be too soft. Citric acid adds a slight sourness to the dessert, which helps balance the sweetness of the meringue, making its taste more harmonious and pleasant.
-
Step 2
Add egg whites and a pinch of salt to the mixer bowl.
Make sure the bowl is completely clean and dry, as any presence of fat or moisture may prevent the egg whites from whipping properly.
-
Step 3
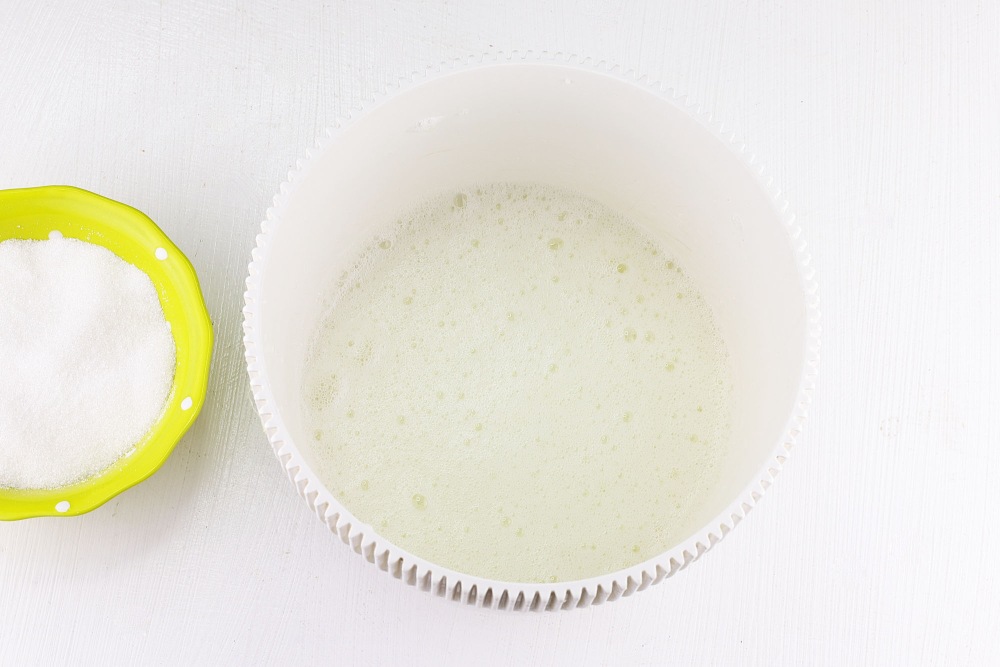
Begin beating on low speed (this will help avoid spattering) until the whites begin to form a stiff foam.
Since my mixer is 500 watt, it did the job in 2-3 minutes.
Watch the master class “HOW TO SPEND NO MORE THAN 1 HOUR A DAY IN THE KITCHEN AND AT THE same time feed everyone tasty and healthy”👉🏻HERE

-
Step 4
Add sugar in several additions without stopping the mixer. It is important to continue beating at low speed so that the sugar grains have time to dissolve into the whites. This will help achieve a smooth and consistent meringue texture.
Gradually add sugar 2-3 teaspoons at a time, giving each portion of sugar time to dissolve before adding the next. This prevents the sugar from crystallizing and helps the whites whip properly, creating a glossy, dense mass.
At this stage, when all the sugar has already been added, you can add additional flavorings — either vanilla sugar (about 5 g) or vanillin (0.5 g). This will give the meringue a pleasant aroma, which will highlight the taste of the finished dessert and make it even more festive.
-
Step 5
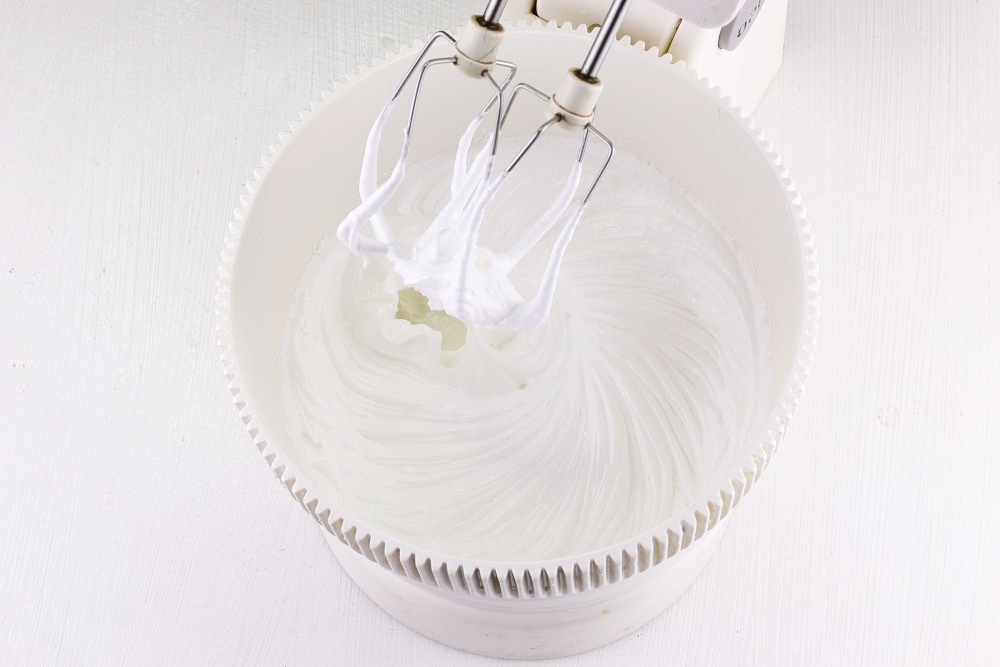
After adding all the sugar, the protein mass should be more dense.
-
Step 6
Pour citric acid into the protein mass. This will help stabilize the proteins and give them the strength they need to form tight peaks.
Increase the mixer speed slightly so that the citric acid is evenly distributed throughout the whites, and continue beating until stable, dense peaks form. The mixture should be glossy, smooth and dense enough to hold its shape without being too dry.
The whipping time depends on the power of the mixer. If you have a 500-watt hand mixer, the process may take about 5-7 minutes on medium speed. It is important to monitor the texture — as soon as the mass begins to hold its shape and remains in the form of hard peaks when the beaters are lifted, this will mean that the whites are ready.

-
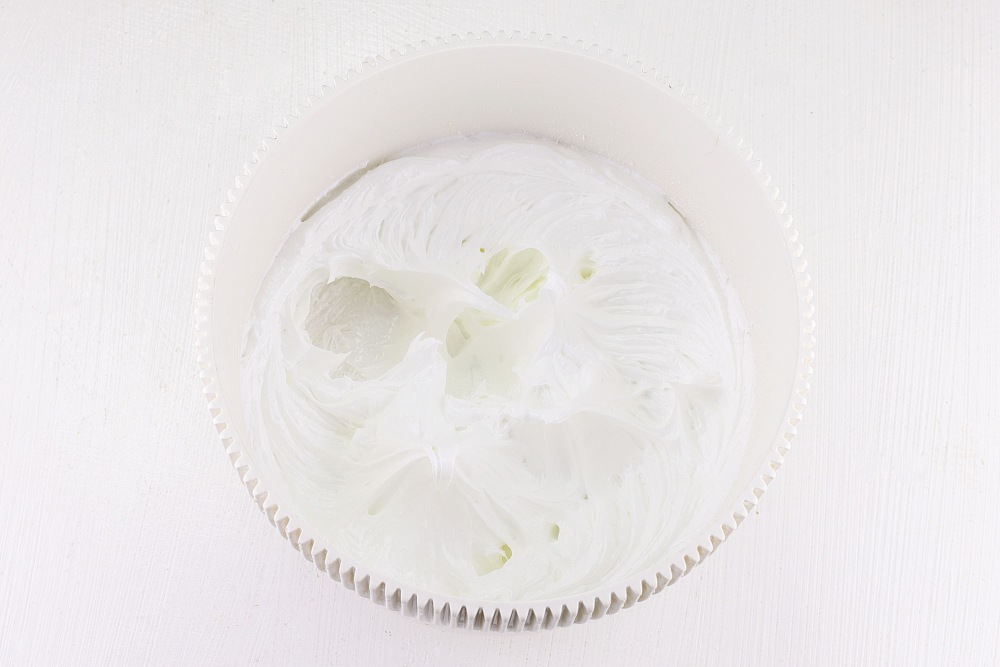
Step 7
Once the egg white mixture is firm and holds its shape (the peaks should be firm and not bend when you lift the mixer beaters), turn off the mixer.
It is important not to overbeat the egg whites at this stage. If you continue to beat for too long, the mixture may become dry and brittle, causing the meringue to lose texture. Therefore, as soon as the whites reach the desired consistency — dense, shiny and glossy — it is better to stop whipping. Make sure the mixture does not fall off and retains its shape.
After adding sugar and citric acid, and the mass has become thick and stable, you can divide the protein mass into several parts if you want to make multi-colored meringues. Add a few drops of gel or liquid dye to each part of the protein mass. It is better to use gel dyes, as they do not liquefy the mass like liquid ones. Add the dye and mix gently so that the color is evenly distributed but does not disturb the structure of the proteins.
-
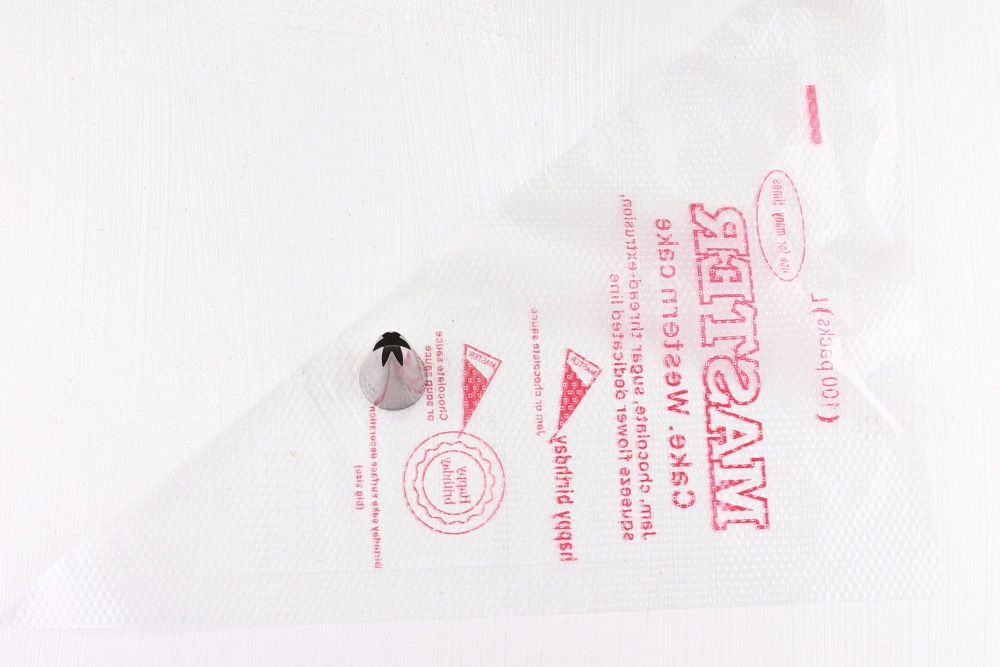
Step 8
To pipe meringue trees you will need a pastry bag and an open star tip.
A nozzle with this shape is ideal for creating a herringbone texture, as its jagged shape gives the meringue a beautiful «herringbone» look.
-
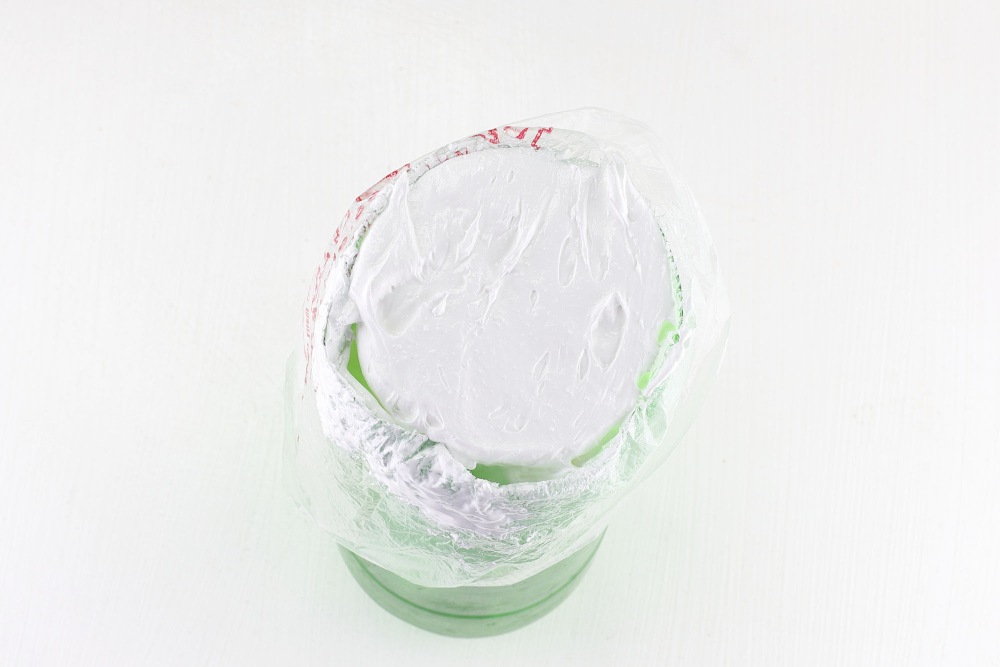
Step 9
Prepare the piping bag: carefully insert the tip into the bag and trim off the tip, leaving a small area so that the tip holds well.
Then fill the bag with the prepared protein mixture, filling it halfway or a little more. This will allow you to conveniently work with the mass and plant the Christmas trees without extra effort.
Before you start pipetting the meringue, it is advisable to squeeze the mixture a little through the nozzle to make sure that it comes out evenly and does not leave any air bubbles. This will help control the shape of the meringue and avoid defects.
-
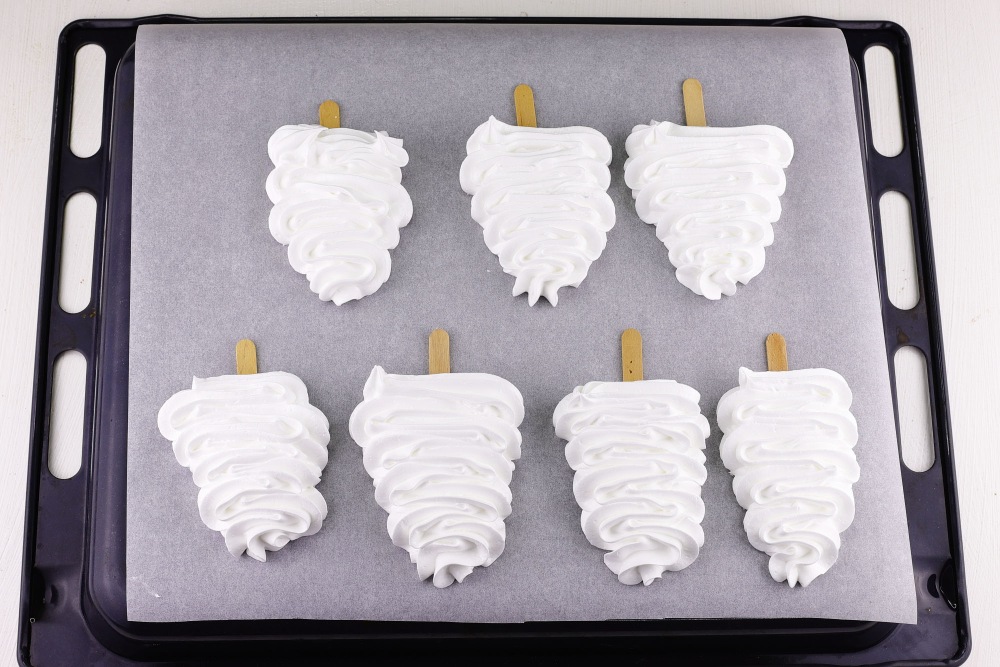
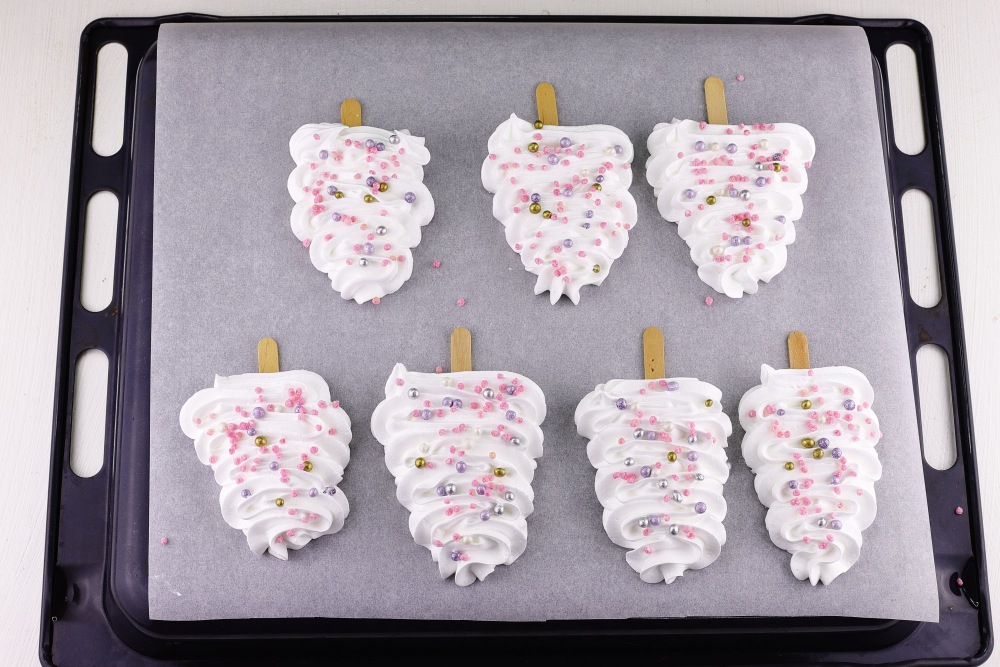
Step 10
Line a baking sheet with siliconized parchment. This will ensure that the meringue does not stick and can be easily removed after baking. Place meringue sticks.
I use popsicle sticks because they are a good size and durable. Place them on a baking sheet with a small gap between them so that the meringues do not stick together in the future.
Place the protein mass on each stick, forming a Christmas tree. Start from the top of the stick, squeezing the mass into a cone, gradually expanding towards the bottom.
Try to make the meringues symmetrical and the same size so that they look beautiful and do not lose their shape during baking.
-
Step 11
Decorate the meringue trees with confectionery sprinkles to taste. You can use multi-colored, gold or silver sprinkles to give the dessert a festive look. Add the topping carefully, immediately after depositing the meringue, so that it sticks well to the surface.
Place the baking sheet in a preheated oven at 80°C. It is important that the oven is at a low temperature, then the meringues will dry slowly and retain their snow-white color and crispy texture.
Drying time is 3-5 hours, but it depends on the power and features of your oven and the size of the meringue. If the oven is weaker, the meringue may need to sit longer; if stronger, a little less.
I dry two baking sheets at the same time on convection mode so that the hot air circulates evenly and the meringues dry at the same time. If you don't have a convection mode, you can swap the baking sheets around halfway through drying so that the meringues bake evenly.
-
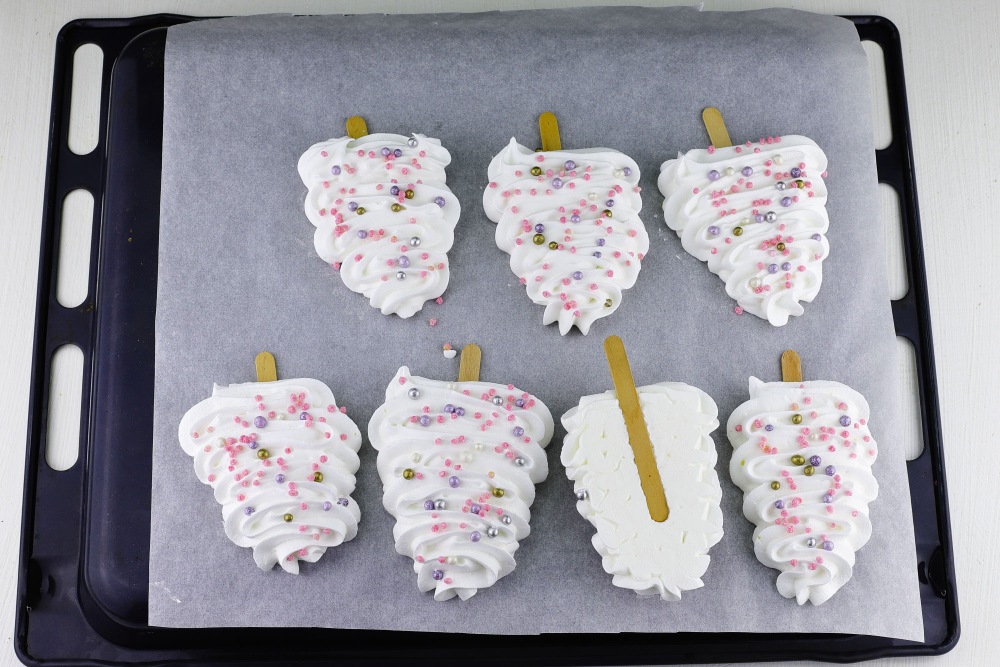
Step 12
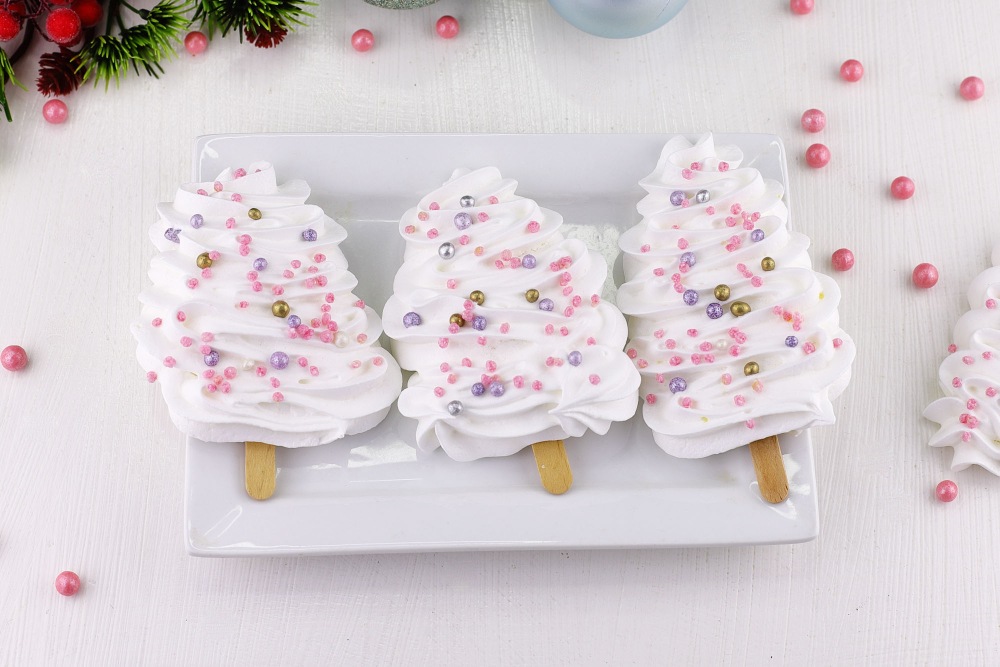
Meringue Christmas trees are ready. They should be crispy on the outside and easily release from the parchment, indicating they are completely dry. After turning off the oven, leave the meringue in the oven until it cools completely. This will help avoid sudden temperature changes that can affect the texture.
When the meringues have cooled completely, you can carefully remove them from the parchment. If the Christmas trees have cooled down and everything went correctly, they should be absolutely crisp and not breakable.
-
Step 13
Once the meringues have cooled completely, place them in an airtight container. This can be a plastic or glass jar with a tight-fitting lid, a plastic container, or special gift wrapping. It is important that the packaging is airtight so that the meringues do not absorb moisture from the air.

-
Step 14
Christmas tree meringue on a stick is ready. It turned out 15 Christmas trees. Enjoy your tea!
📌 For other proven recipes for DESSERTS FOR THE NEW YEAR, SEE 👉🏻 HERE