
Step 1
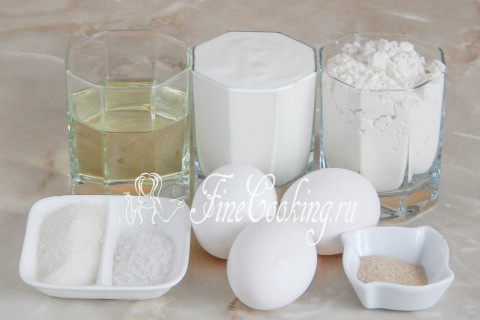
First of all, we will prepare products for the preparation of yeast dough: wheat flour (I have the highest grade), sour cream (any fat content), chicken eggs, refined vegetable (in my case, sunflower) oil, salt, sugar and high -speed yeast. All ingredients should be at room temperature. The dough can be made both in the bread machine (my version) and with your hands.
Step 2
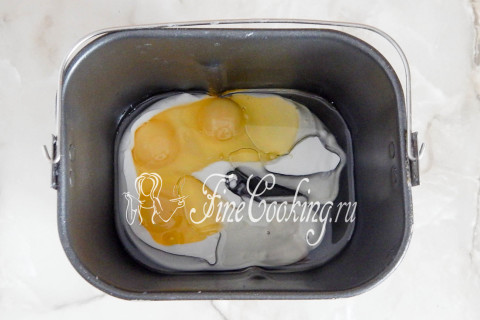
Depending on the model of the bread maker, the laying of the ingredients can be of two types: first liquid, then bulk and vice versa. I have the first option. Pour vegetable oil (without smell), sour cream and break the eggs into the bakery container. We’ll chat a little.
Step 3
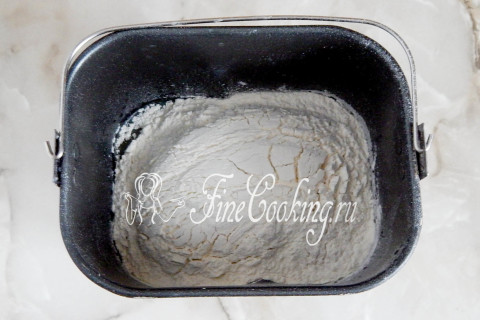
Now add sifted wheat flour.
Step 4
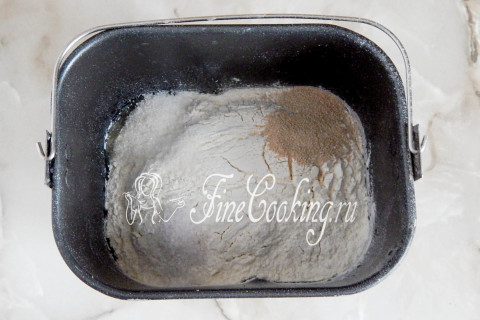
At the end, pour salt, sugar and high yeast on different corners of the bowl.
Step 5
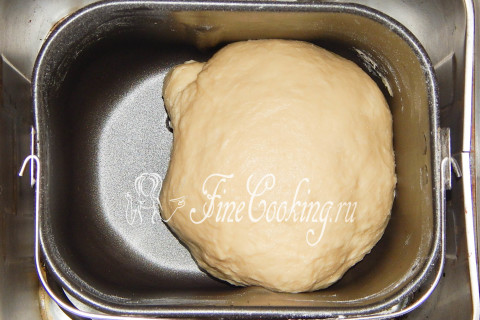
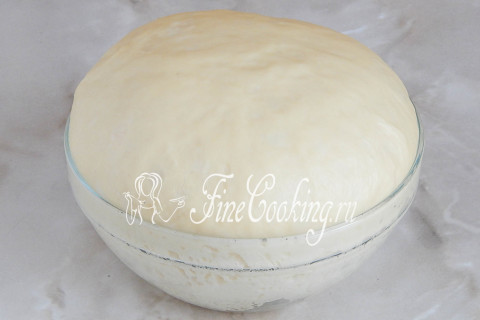
In my bread maker, the dough mode provides for the duration of kneading and proofing exactly 1 hour. But I don't like it so much, because the yeast test is at least 2 hours. That is why I recommend that you do as follows: we exhibit the main (3 hours) program or French bread (3 hours 50 minutes). The batch begins: in the first program, the first batch lasts 10 minutes, and in the second — 15 minutes. So much time is enough. To knead the dough well and get an elastic soft bun. Literally after 5 minutes from the beginning of the batch, it must be formed. Moreover, this is a very important point, because the quality and humidity of the flour is different, therefore this product may require more or less than according to the recipe. If the bun can still not form, feel free to add a tablespoon of flour and follow the batch. When the dough completely moves away from the walls and will be quite elastic (that is, not to spread, but to keep the shape well), we stop the addition of flour. This is what my bun looked after 8 minutes of batch. Now leave the dough alone and let him grow up. It will take about 1 hour 40 minutes (main) or 2 hours 25 minutes (French bread), during which the bread machine will take a fry twice (three times). I prefer to use the second program.
Step 6
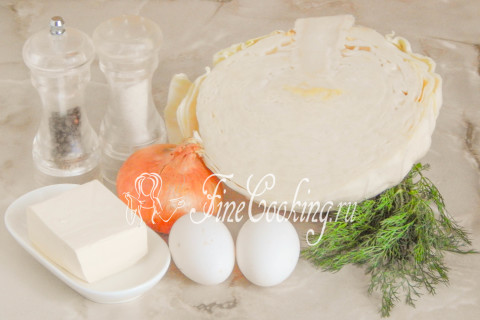
While the dough wanders, we will take up the filling for future pies. To do this, take white cabbage, chicken eggs, one large or pair of medium bulbs, butter (I highly recommend the use of butter, not vegetable oil — so the filling will be more delicate and fragrant), fresh dill, salt and black pepper. Immediately put two chicken eggs in a boiled egg (8-10 minutes after boiling), then add them to the filling.
Step 7
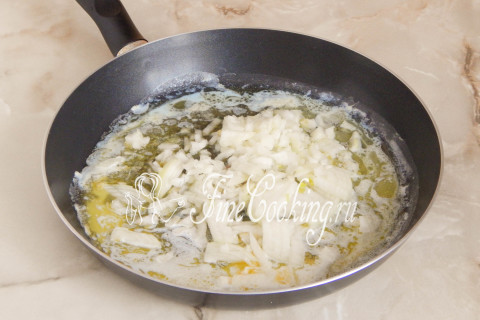
We take a large and deep enough pan, put it on the stove. We melt the butter in a pan and put on the onions there, which must first be cleaned and cut into a small cube.
Step 8
We fry the onion in butter to a rosy state, not forgetting to periodically stir it so as not to burn.
Step 9
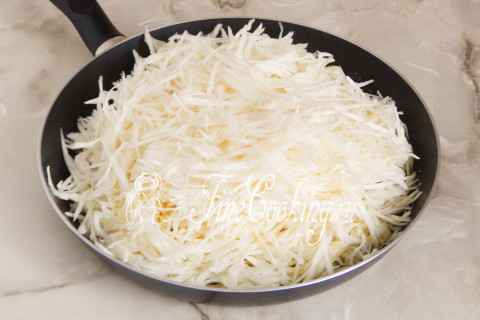
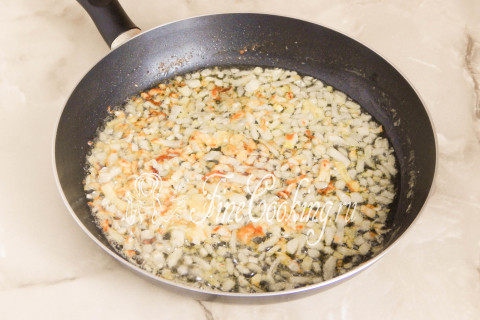
While the bow was fried, we already subtly chopped white cabbage. If you wish, you can use the Beijing — it is more tender and is prepared much faster. Add chopped cabbage to fried onions, mix, salt and simmer under the lid on fire below the average to the softness of vegetables. I will not tell you the cooking time, as it depends on the age of cabbage, that is, its juiciness and rigidity. If the cabbage is too dry, add water.
Step 10
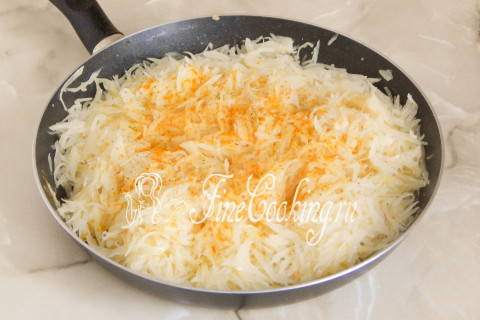
When the cabbage becomes soft, you can add turrets for the color of turmeric. In the ingredients for the filling, I did not indicate it, since it is used at will. Kurkum gives dishes a yellow tint, but do not overdo it (enough literally a pinch) so that the food does not acquire a strong taste of this spice.
Step 11

We bring the cabbage to readiness without a lid so that excess moisture is evaporated. Constantly stirring, still brown cabbage — so it will also be fragrant.
Step 12

Remove the pan from the heat and add finely chopped dill, as well as boiled chicken eggs, which also need to be cut into small cubes. Pepper cabbage to taste.
Step 13

Mix everything and let the filling cool completely (for this, transfer it to another dish and stir it from time to time so that it cools faster — you can’t use a hot filling for yeast pies).
Step 14
The yeast dough has already come up and you can work with it. We crush it and divide it into pieces (I have 12 pieces) of the same size.
Step 15
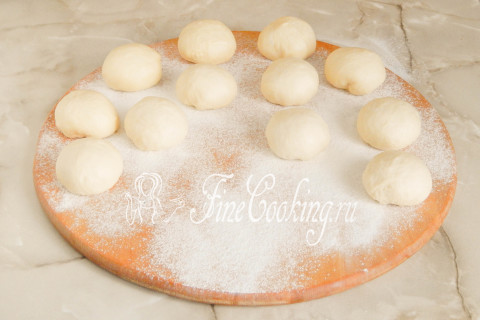
Sprinkle the working surface a little with wheat flour, and round each piece of dough and roll into the ball. During molding pies with cabbage, the dough should be covered with a towel or cling film so that it does not be bent and not covered with crust.
Step 16

We take one piece of dough and flatten it with the palm to release excess air.
Step 17

Upstairs we pursue a cooled filling. I love when there are a lot of filling in the pies, so I don’t regret it — there are about 2 tablespoons of cabbage.
Step 18
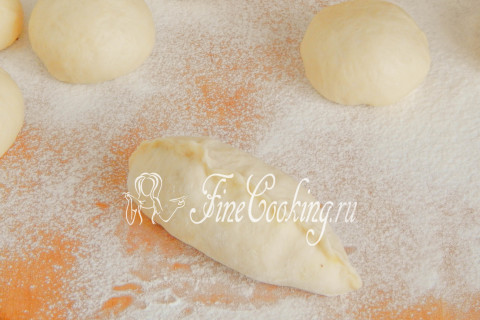
We pinch the dough, giving the pies an oblong shape. This yeast dough is very elastic and crawls perfectly. Fix the seam very well so that the pies do not fall apart during baking.
Step 19

We turn the workpiece with a seam down, additionally driving a little bit of the future pie.
Step 20
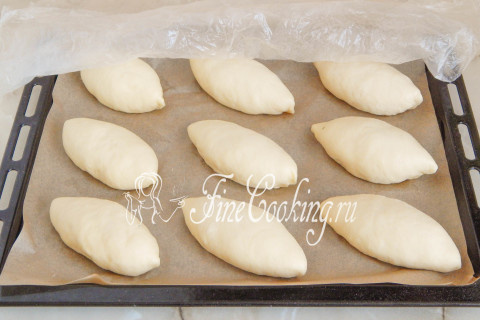
Similarly, sculpt the rest of the pies with cabbage, transfer the blanks to a baking sheet covered with baking paper. We cover the pies with a towel or cling film and give them a distance to the warmth for about half an hour.
Step 21
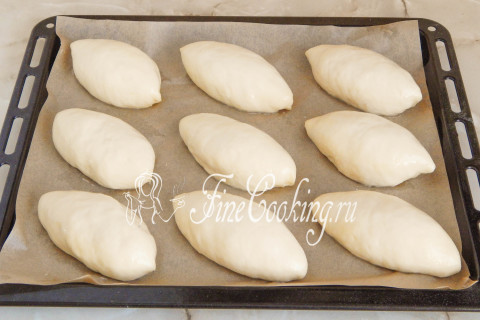
Before planting in the oven, the pies can simply be sprinkled with water, and for a more brutal crust, grease with milk or egg yolk.
Step 22
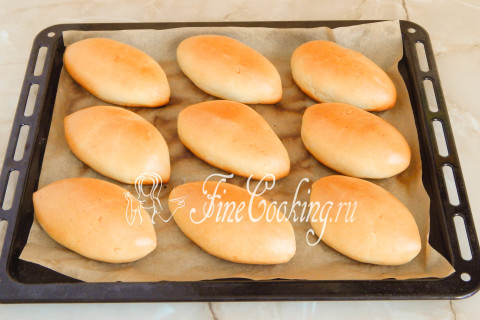
We bake pies with cabbage in a preheated oven at 180 degrees for about 25-30 minutes until a ruddy crust.
Step 23

We remove the finished pies from the baking sheet and let them cool.
Step 24
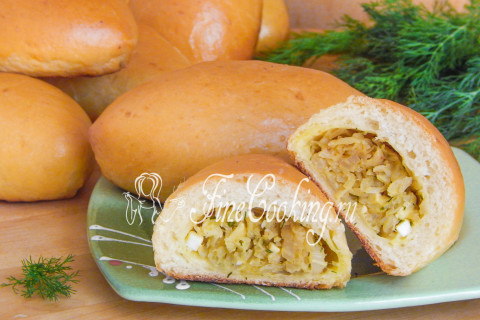
And now you can enjoy the mouth -watering, ruddy and very tasty home pastries. I hope you liked the recipe and you will certainly prepare such pies for your family.