Step 1
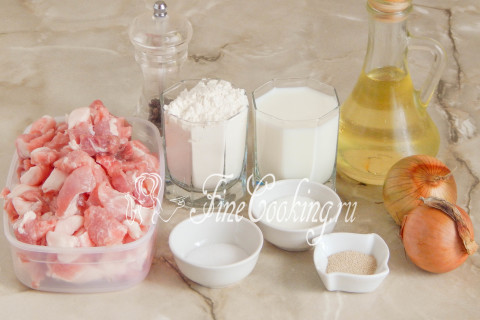
To prepare homemade whites, we take the wheat flour of the highest grade, milk (any fat content), pork, onions (the weight is indicated in already purified form), refined vegetable oil, salt, sugar, yeast, ground black pepper. For frying, we also need vegetable (I have sunflower) oil — you can use any without the smell that is suitable for this purpose.
Step 2
Cooking yeast dough for whitish at home. In the suitable dishes, we sift the wheat flour of the highest grade. Of course, you can immediately pour it directly onto the work surface (table), but in a bowl it is more convenient. A few words about the yeast: to take the fast -acting ones is not necessary — just dry (also 5 grams is 1 teaspoon with a hill) or fresh/wet/pressed (used exactly 3 times more, that is, 15 grams). Such yeast is not immediately mixed with wheat flour, but activated in a warm sweetened liquid for 10-15 minutes. For this recipe, you can very slightly warm up half a glass of milk with a teaspoon of granulated sugar and dissolve the yeast in it. I used fast -acting ones, so I added them immediately to the flour, which I sought in advance twice.
Step 3
We put there 1 teaspoon of salt and 1 tablespoon of sugar, mix everything — so bulk products will be evenly distributed along the mixture.
Step 4
We make a hole in the center and pour warm (not hot, namely pleasant warm) milk into it. Mix everything with your hand or spoon so that the flour is moistened.
Step 5
Flour lumps should be obtained, after which you can add 50 milliliters of vegetable oil. We begin to knead the dough with our hands or with the help of dough (bread makers) — to whom it is more convenient.
Step 6
To knead this yeast dough for whites for quite some time — at least 10 minutes, and even better longer. As a result, you will get a smooth, completely homogeneous dough. It should be very soft and very little sticky. However, such a yeast dough holds its shape perfectly and does not spread. In the process of kneading, you may need a little more or slightly less flour than I indicated in the ingredients — it depends on its humidity. We roll up the dough into the ball and leave it in a bowl (I am always my dishes in which the dough roams — I just do not like dirty). We send the dough to heat for 1 hour, after which we make a light degree, re -rounding and again in heat for another 1 hour. Where is it better to wander the test and what does a warm place mean? There are several options. First of all, in the oven with a light bulb turned on (it turns out about 28-30 degrees — the temperature ideal for fermentation of yeast dough). Then we tighten the bowl with the dough with cling film or cover with a towel made of natural fabric (flax is best suited) so that the surface does not be swollen and not covered with a crust. You can also let the dough wander in a microwave, in which we pre -boil a glass of water. The dough will rise with a door closed, and the glass will stand there. Then the bowl does not need to be closed with anything, since the water will evaporate, thereby maintaining the necessary humidity. Just make sure that no one inadvertently turns on the microwave, otherwise the dough will disappear and will not be whitish.
Step 7
While the yeast dough wanders, we will prepare the fillings for whites. To do this, take pork pulp — it is best suited to fatty meat (about 25-30 percent of the meat with respect to meat). We scroll pork through a meat grinder (I like it more through a nozzle with small holes) along with a peeled onions.
Step 8
Salt and pepper pork minced meat to taste.
Step 9
Mix everything and transfer to the bag. We release the air and tightly tie a package (it is best to use 2 packages — place one in another). Now we will beat off the meat minced meat — we throw a package on the table 100 times. Only not from the entire scale that the packages did not break, but neatly. Thanks to this procedure, the minced meat will become very soft, homogeneous, juicy and at the same time plastic.
Step 10
The filling for homemade whites is ready — while putting it in the refrigerator.
Step 11
After an hour of fermentation, the yeast dough is well suited and will double in volume (this is at least) or even 3 times.
Step 12
We gently crush it, releasing excess gas, round and again from a warm place for another hour.
Step 13
The second time, the dough for future whites will grow even more — four times. By the way, I want to talk a little about the time of fermentation of the yeast dough and the proofing of the workpieces. I hope you understand that this concept is relative. What does it mean? Well, for example, the recipe says that the test should be given to rest for 1 hour. You understand that 1 hour is the time that the author of this recipe was needed. +/- 10-15 minutes- quite acceptable deviation, the entire time of fermentation of the yeast test depends on many factors. Freshness (and as a result of activity) of yeast, the quality of flour, the temperature in the room, the amount of dough — this all affects the time of fermentation and proofing. Therefore, never clearly follow these recommendations — you must feel the dough, understand what he needs and then you will cook it purely intuitively.
Step 14
The stage of molding of future blankets for whites: divide the dough into small pieces (try to make them the same size) no more than an apricot. Each piece of dough must be rounded and rolled into a ball (how to do this can be seen in this recipe — 11-14 steps). From this amount of dough, I decided to cook 17 whites. We will cover the workpieces with a cling film or towel so that we do not get bent, and let the test relax for 5-7 minutes.
Step 15
Meanwhile, we take the minced meat from the refrigerator and also divide it into 17 parts. We roll each piece of minced meat into the ball.
Step 16
We begin to form future whites. We take one ball of dough and roll it out (knead with our hands) in a rather thin round layer.
Step 17
In the center we put a ball of minced meat and flatten it with the back of the palm so that it turns out a rather flat cutlet. If you make the filling too thick, it may not have time to prepare and will remain half raw.
Step 18
The shape of the whites is quite simple: pull the dough in a circle up and pinch in such a way that the hole is obtained. It is necessary that when frying the filling is completely prepared. Similarly, we form all other blanks. While finishing with the latter, the first will have time to distance and they can be frying. If it seems to you that a decent amount of time is needed for molding, cover the workpieces with a towel or cling film so that the surface of the dough does not be blown.
Step 19
In a deep and wide pan (I have 26 centimeters with a diameter of 26), we heat about 450 milliliters of refined vegetable oil. It is very important to heat it properly so that the dough does not absorb a lot of it. You can check the degree of heating as follows: lower a small piece of dough into the oil and, if it immediately starts to be covered with bubbles and fry, the oil is ready. In hot oil, we put the blanks with the open side down — how much you get into a frying pan. True, do not put a lot at once — let the whites float freely in oil. Fry over medium heat to the rosy lower side. If you make strong fire, the dough will quickly fry, and the filling inside will partially remain raw. On low heat, the dough will absorb a lot of oil, so find the middle ground.
Step 20
When the lower side is properly browned, gently turn the whites with wooden shoulder blades and fry on the other side until cooked.
Step 21
We put the finished golden whites on a plate with a paper towel or napkins so that excess oil is absorbed into them. Similarly, fry the rest of the blanks.
Step 22
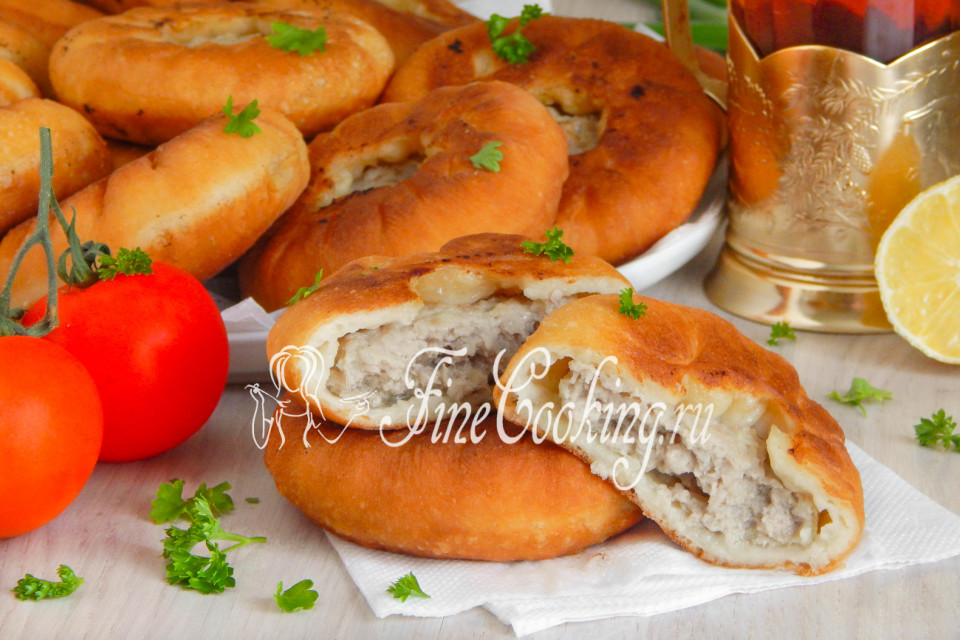
The tastes are the most homemade whites with the heat of the heat, when they are still hot and right from the pan. The crust is crispy, the dough is tender, the filling is incredibly juicy. So juicy that meat juice flows right on the hands. Of course, this dish is not for every day, but homemade whites are million times tastier than purchased! Try it, do not regret it, friends!


