Detailed step-by-step recipe with photos: Step 1
-
Prepare the ingredients. Water and milk can be mixed immediately in a measuring container. Instead of regular milk, you can take dry milk and dilute it with water: 25 g per 160-170 ml of water to make 190 ml. You can sift the flour immediately, weighing out the required amount.
Butter is suitable from 72.5% fat content. The main thing is that it does not contain milk fat substitutes. Eggs are used with CO, but you can use C1, the number of eggs depends on the consistency of the dough and may vary.
For the cream, you will definitely need fatty sour cream — from 30%. You can also take the rustic one, which is fattier. But with it the cream turns out to be very “heavy”, and the characteristic sourness is practically absent. You will also need powdered sugar for the cream. Sugar is worse because it dilutes the sour cream.
Tip: if you grind the powder yourself with a blender or coffee grinder, let it cool completely before adding it to the cream. It's better to do it in advance.
I use vanilla extract to add a nice natural vanilla flavor to the cream, but you can omit it altogether.
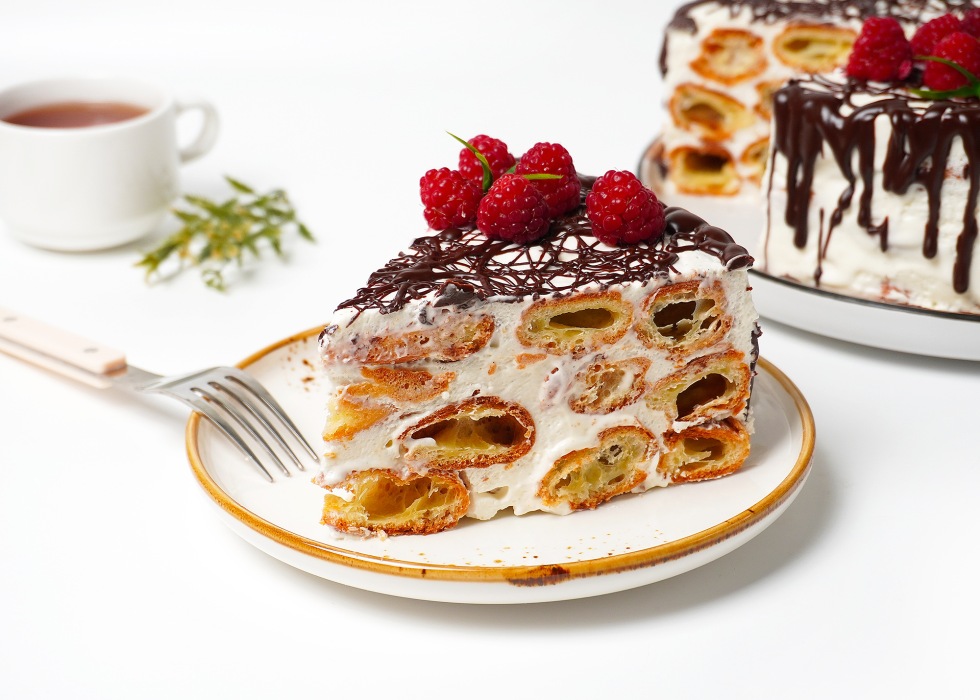
To decorate the “Lady fingers” cake with sour cream according to the classic recipe, use dark chocolate and a little butter. Also suitable are fresh or frozen berries that hold their shape well, or fruits such as bananas or grapes.
-
Step 2
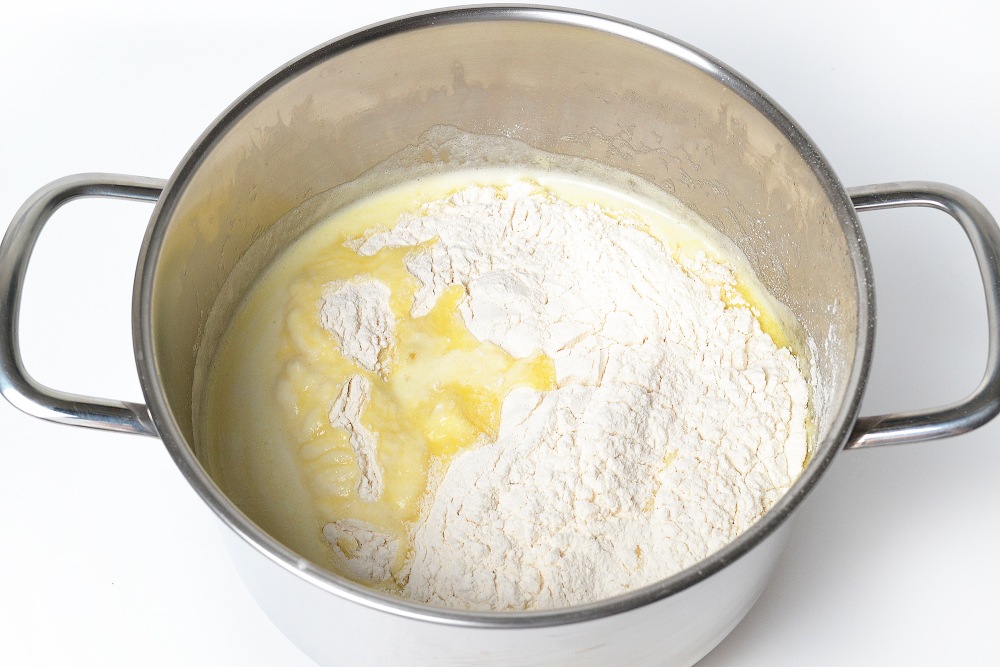
In a saucepan, combine water with milk and butter, add a pinch of salt and put on fire slightly above average (4-5/6 for an electric stove). Bring to a boil and immediately turn the heat to low.
Watch the master class “HOW TO SPEND NO MORE THAN 1 HOUR A DAY IN THE KITCHEN AND AT THE same time feed everyone tasty and healthy”👉🏻HERE

-
Step 3
Pour in the entire volume sifted flour and, stirring constantly, brew the dough.
Tip: use a wooden spatula, it is most convenient to turn the dough over and collect it from the bottom.
-
Step 4
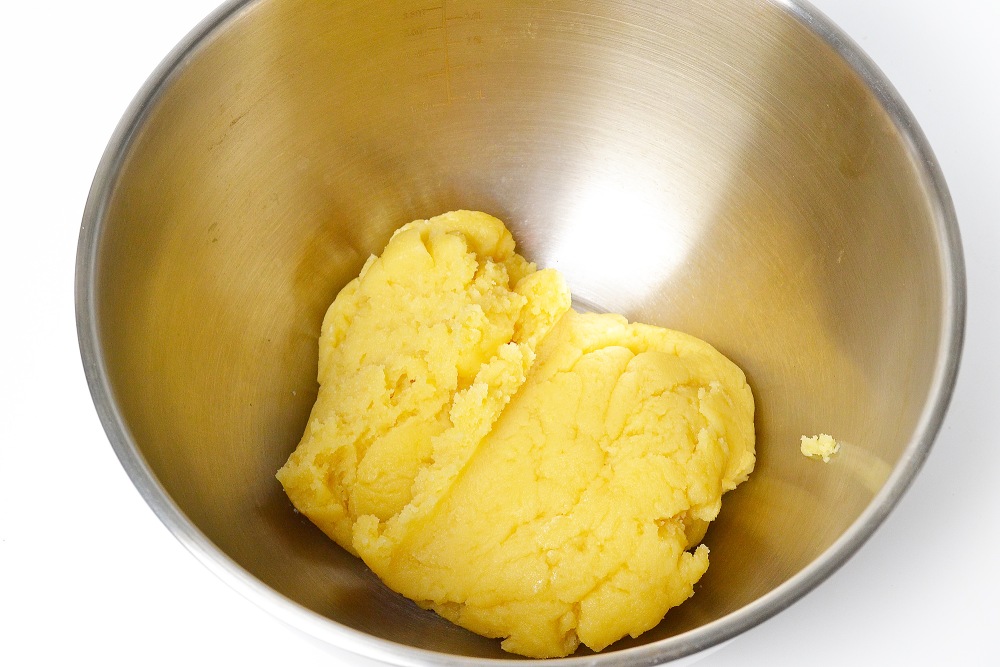
When brewing the dough, turn it over on all sides so that there are no areas with flour left. When the dough begins to come together into a ball and a light coating appears on the bottom, it is ready. On average, it takes 3-4 minutes.
Advice: it is impossible to overcook the dough, but it is quite possible to undercook it. Therefore, it is better to stir a little longer.

-
Step 5
Transfer the dough to a deep bowl to cool. Choose a bowl in which it will be convenient to knead the dough for the “Lady Fingers” cake with sour cream according to the classic recipe.
You may be interested in:
Cakes with condensed milk: 10 simple recipes
-
Step 6
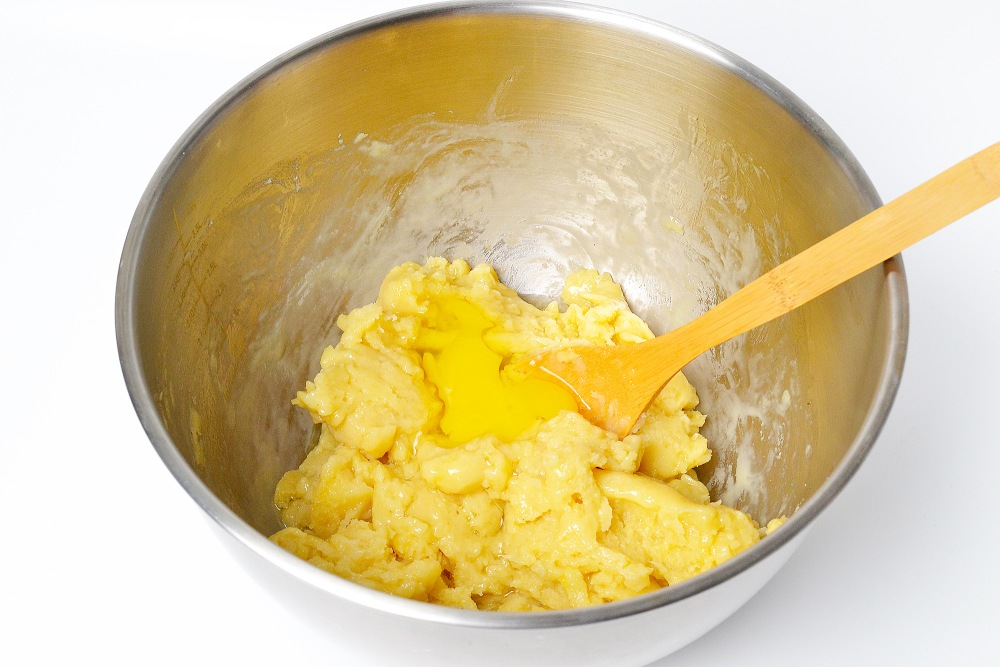
When the dough is warm, about body temperature, start adding eggs one at a time. Mix thoroughly with a spatula after each. The first 5 eggs can be added without worrying about the consistency of the dough.
-
Step 7
After 6 eggs, do a strip test: run your finger across the dough straight to the bottom. If the strip does not converge, then you should add 1 more egg. The edges of the finished dough close almost immediately after applying the strip. And the appearance of the dough becomes oily, not matte.
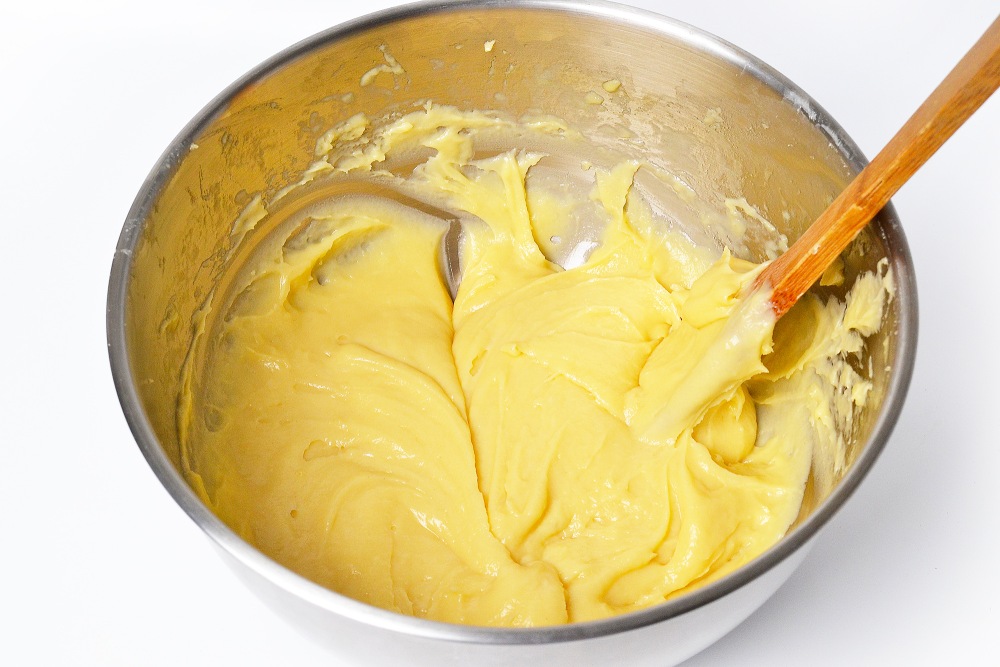
You can determine the finished consistency by the fall of the dough from the spatula: it rolls out in a thick, slow ribbon, rather than falling in pieces, and is gently pulled by the spatula or spoon.
-
Step 8
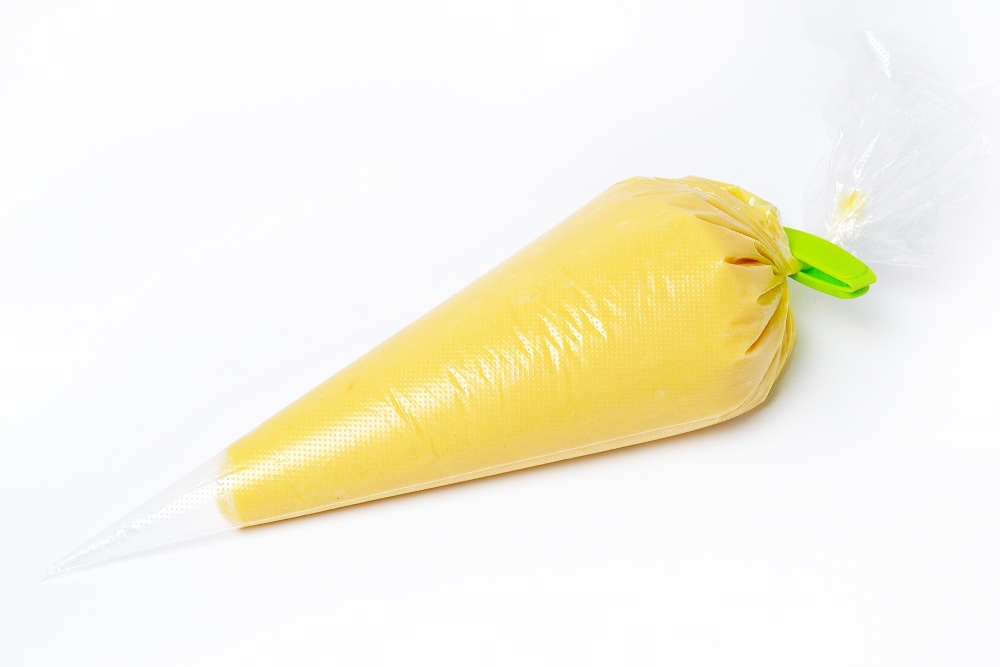
Transfer the dough into a pastry bag without a tip. Choose dense, reliable bags, since sometimes you have to put out the dough under considerable pressure. Cut off the “nose” with a diameter of about 1-1.5 cm.
At this stage, you can turn on the oven to warm up to 210-220 degrees.
-
Step 9
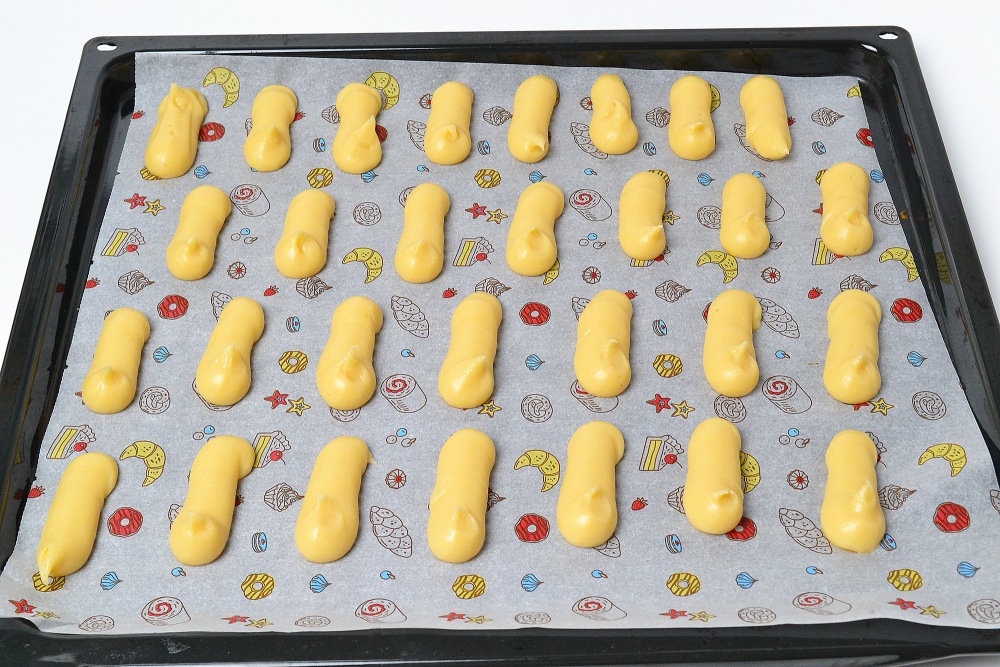
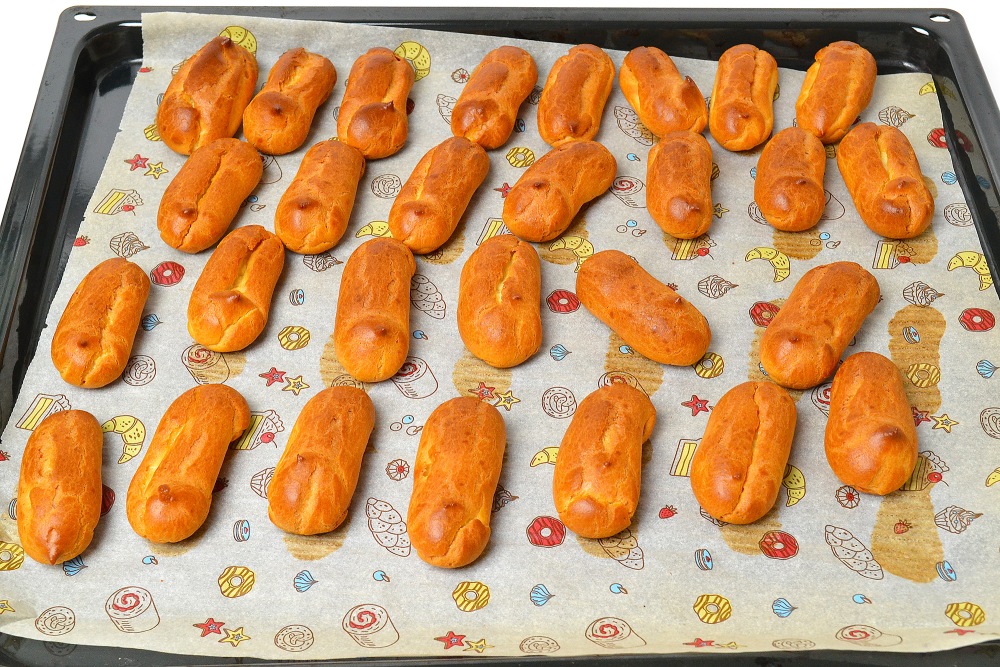
Line a baking sheet with siliconized parchment and place the “fingers” at a distance from each other, as they will increase in size. The size of the “fingers” is 4-5 cm; perfect evenness is not needed for the cake.
-
Step 10
Place the “fingers” in the oven on the middle level for 15-17 minutes, or until the pieces begin to color on top (a golden crust begins to form).
Then reduce the power to 180-190 degrees and bake for another 10 minutes. The final stage is to set the temperature to 150-160 degrees and dry for another 7-10 minutes. The main thing is that they do not become too dark and burnt.
Tip: be sure to check the custard by knocking on the baking sheet. It should be hard on top, not soft. You can break one “finger” and check that there are voids inside and that there is no raw dough.
Allow the pieces to cool completely before adding the cream. At least 2 hours.
-
Step 11
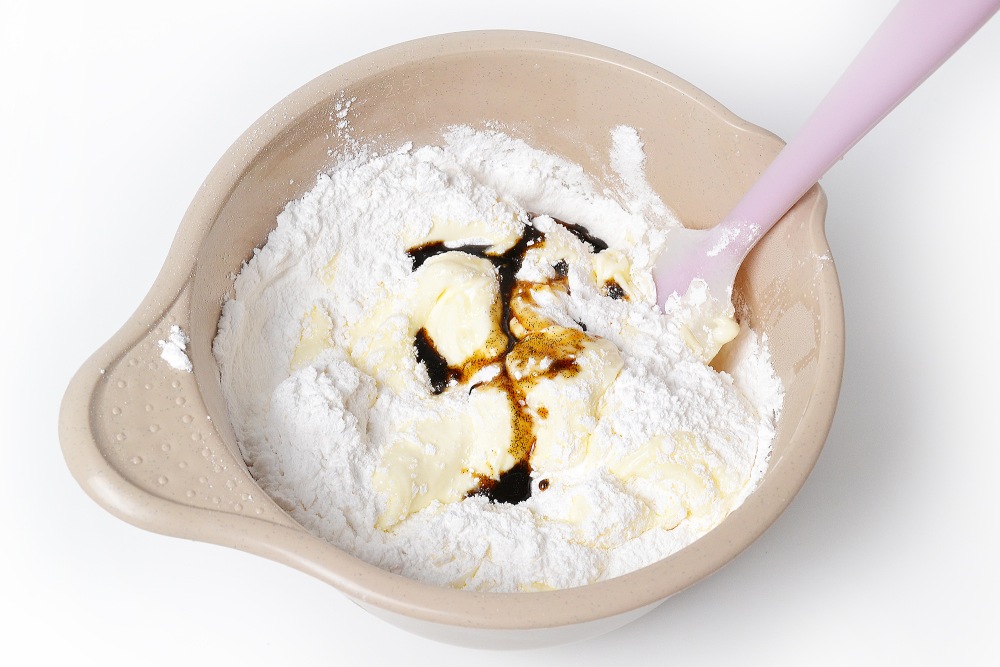
To make the cream, mix cooled sour cream with powdered sugar using a spatula or whisk.
Tip: adjust the amount of powdered sugar to your taste, as the custards are not at all sweet.

-
Step 12
Add 1 tsp. vanilla paste or essence — optional.
-
Step 13
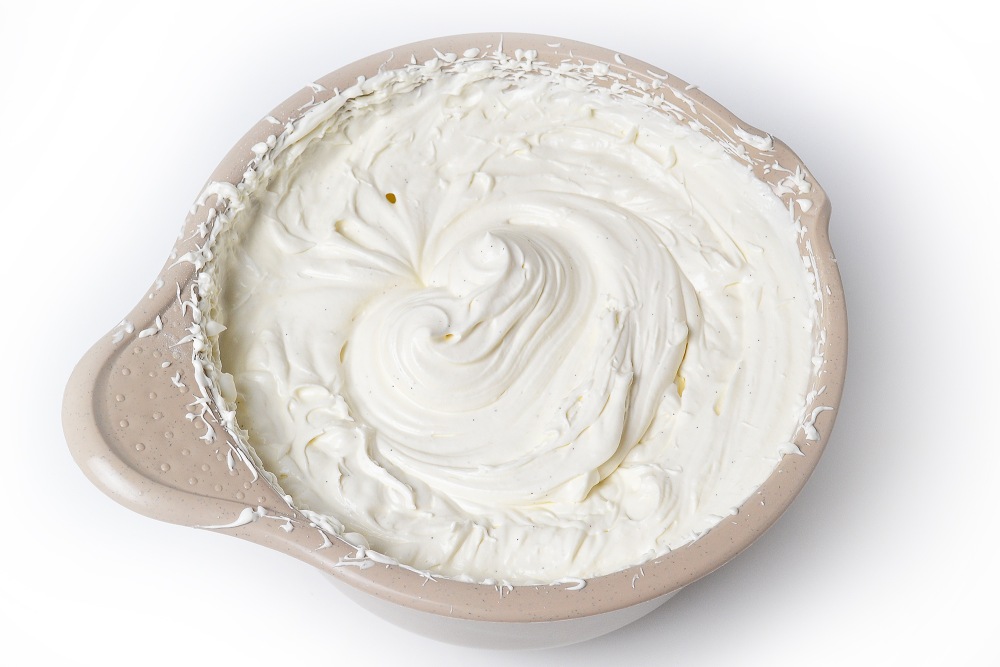
Beat with a mixer: first at low speed, then at medium speed and so on until it reaches maximum speed. The cream turns out to be moderately stable, traces of the whisks remain on it for a long time. The cream does not spread. The whole process takes 7-10 minutes.
-
Step 14
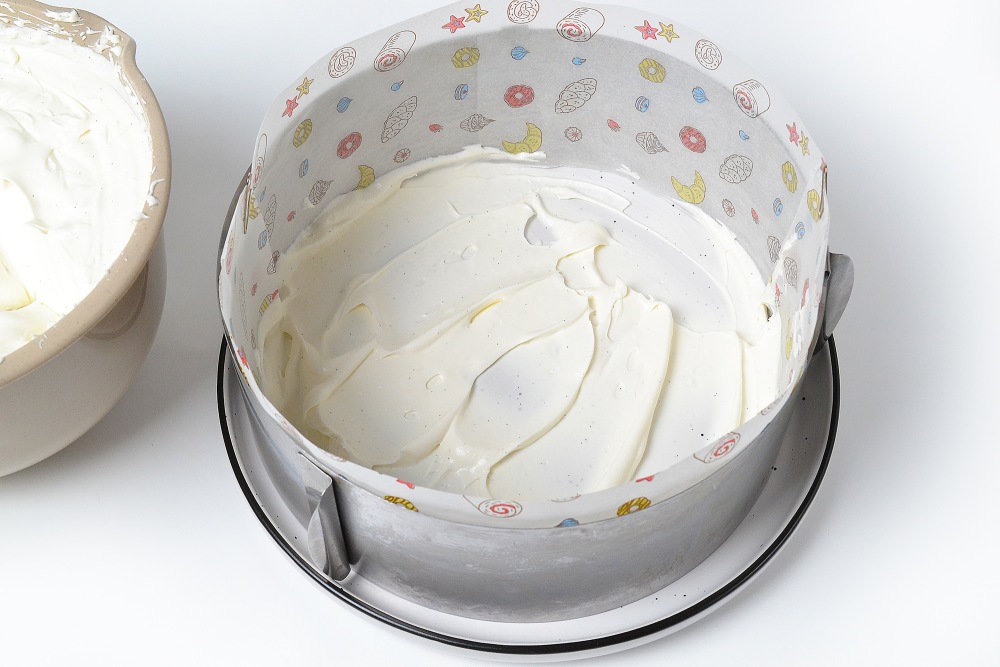
Place a detachable pastry ring or a mold with a removable bottom on the plate on which the cake will be assembled. The sides should be lined with parchment to make the mold easier to remove.
Apply a small layer of sour cream to the bottom using a spatula.
Tip: you can take a plate with shallow sides, like mine. With it, the cake turns out visually neat and does not require eliminating drips at the bottom or laying out parchment.
-
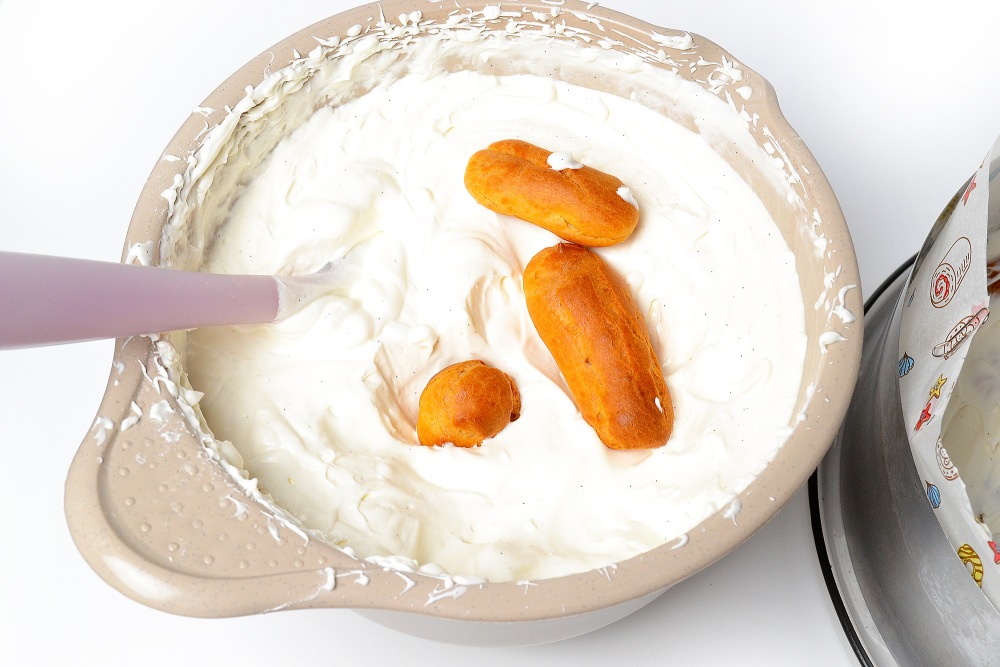
Step 15
Immerse the custard pieces completely in sour cream.
-
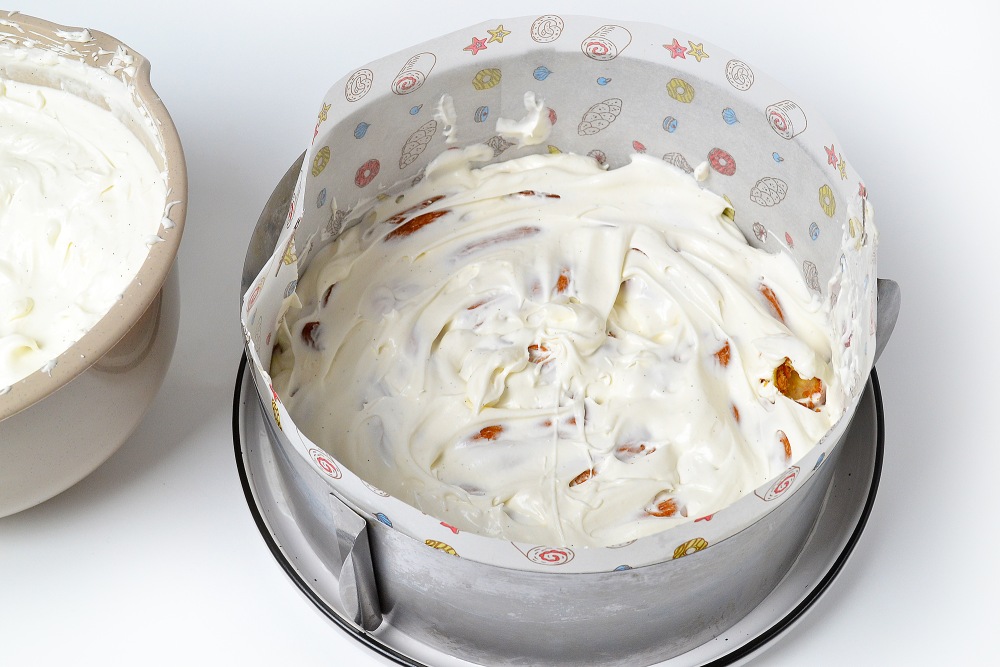
Step 16
Immediately transfer them to the pan, creating the first layer of the cake. Lay the blanks bottom down, selecting the appropriate size so that the layer is uniform and without large holes.
If desired, you can grease the top with a small amount of cream using a spatula.
-
Step 17
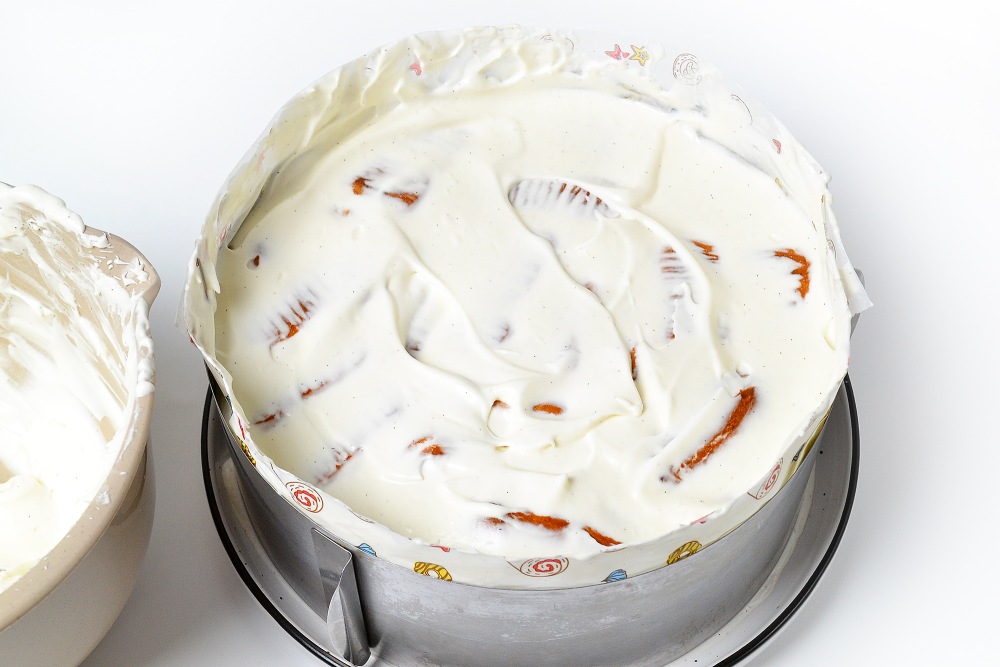
Place a second layer and coat with cream again. Then lay out the third layer with the bottoms of the “fingers” up – this will make it a little smoother.
Tip: where small voids remain, you can lay “fingers” broken in half.
If there is a lot of cream left, you can cover the top of the cake with it again. Overall, this cake does not require leveling.
-
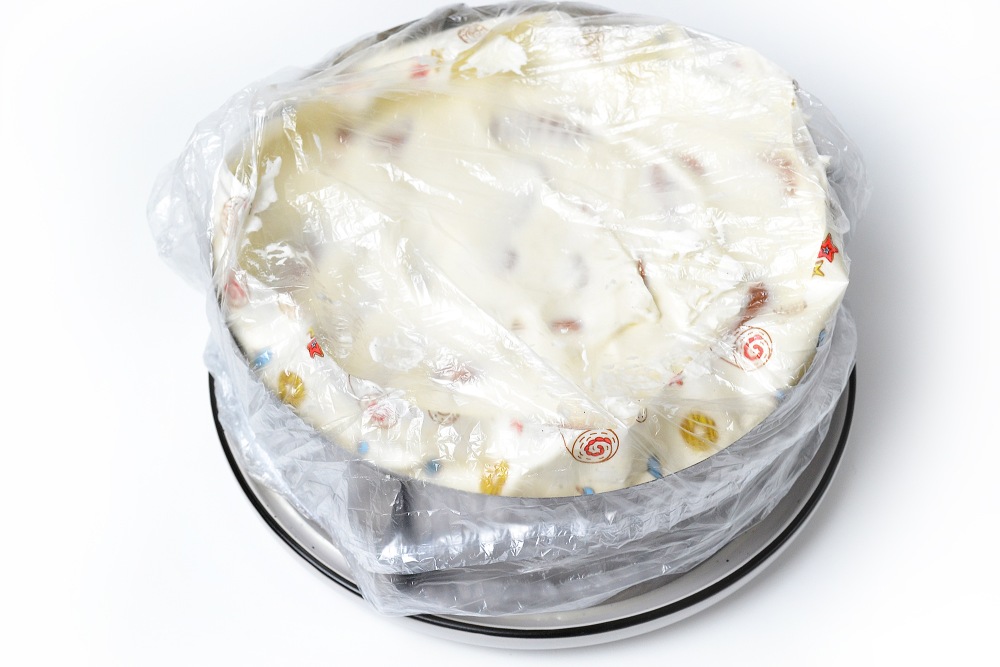
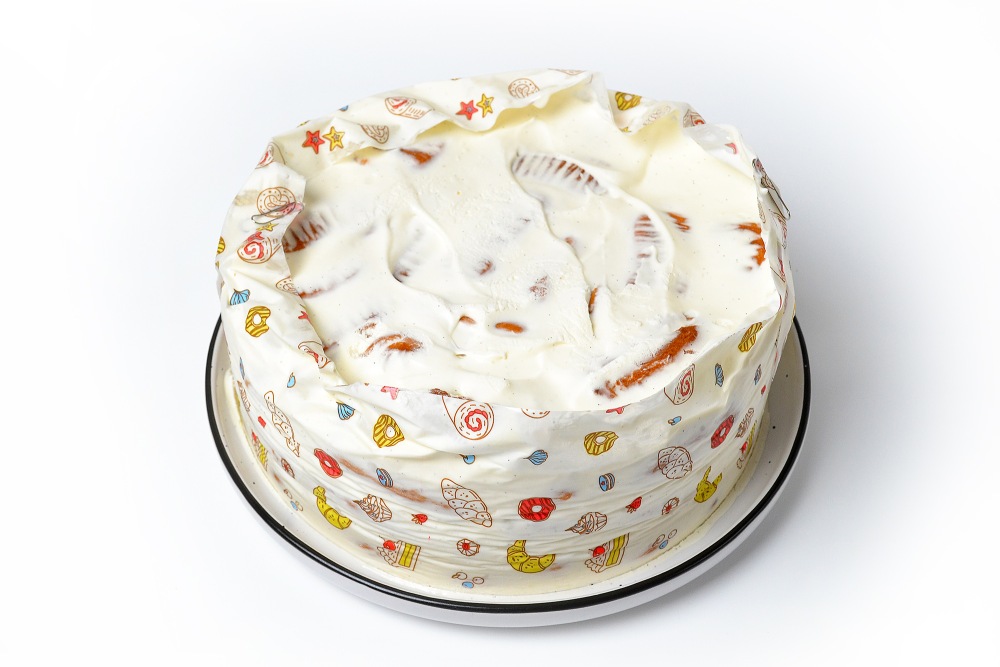
Step 18
Cover the cake with film or a cap bag and put it in the refrigerator overnight. In 7-8 hours it will be perfectly saturated and stabilized.
-
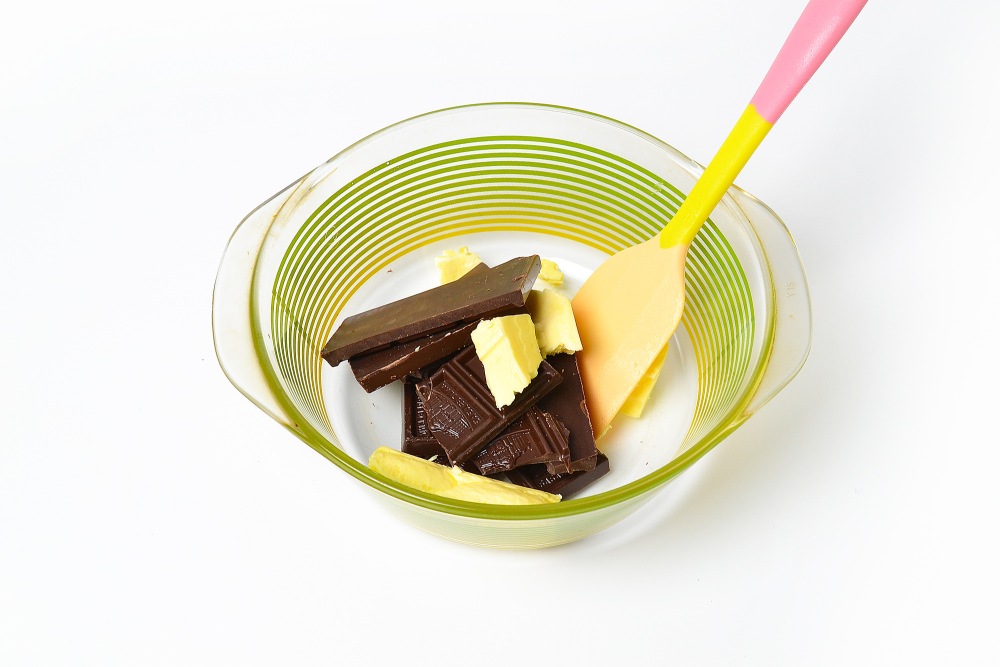
Step 19
Combine chocolate with butter and melt in a water bath or in the microwave. For a water bath, place a smaller plate or pan on top of the pot of simmering water. Stir until the chocolate dissolves.
-
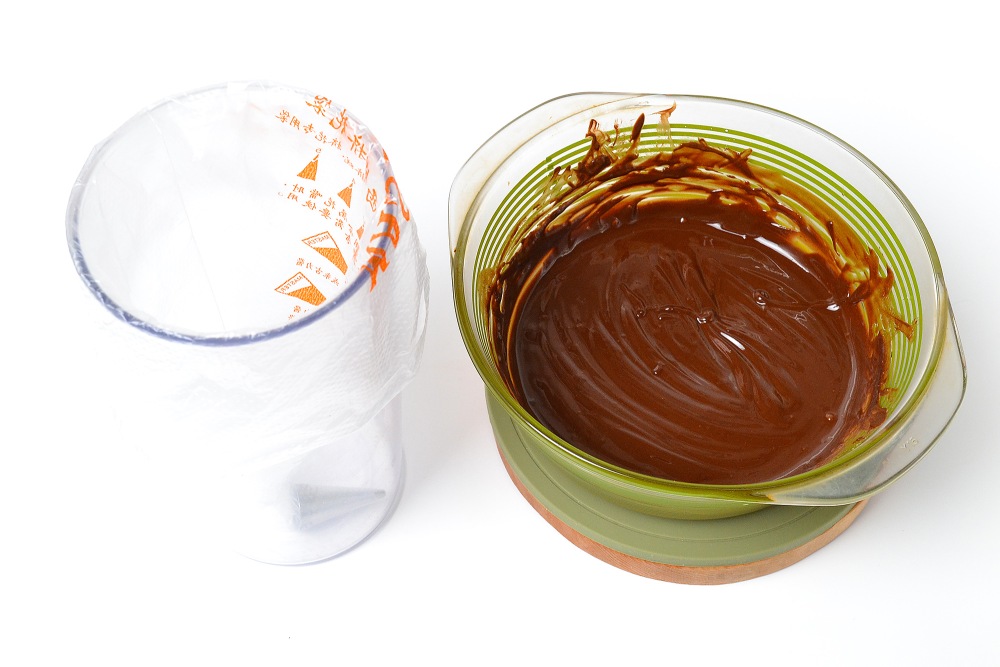
Step 20
Immediately transfer the chocolate to a small piping bag. It should be very fluid, not thick.
Important: you need to apply chocolate to the cake when it has cooled, but has not yet hardened. About 20-30 minutes after cooking.
-
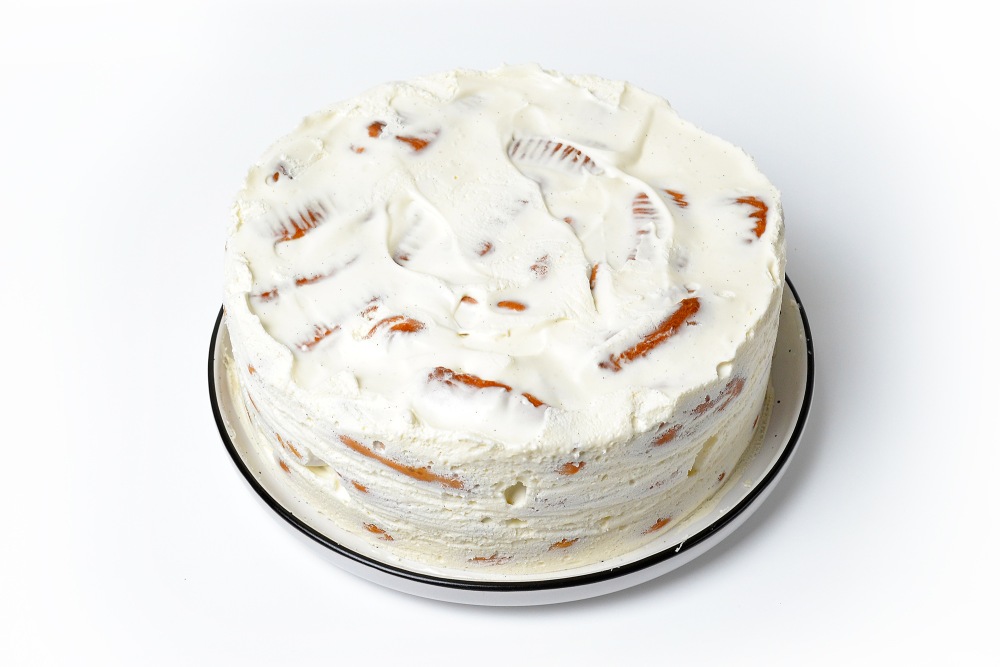
Step 21
Release the cake from the culinary ring.
-
Step 22
And remove the parchment, carefully, without jerking.
-
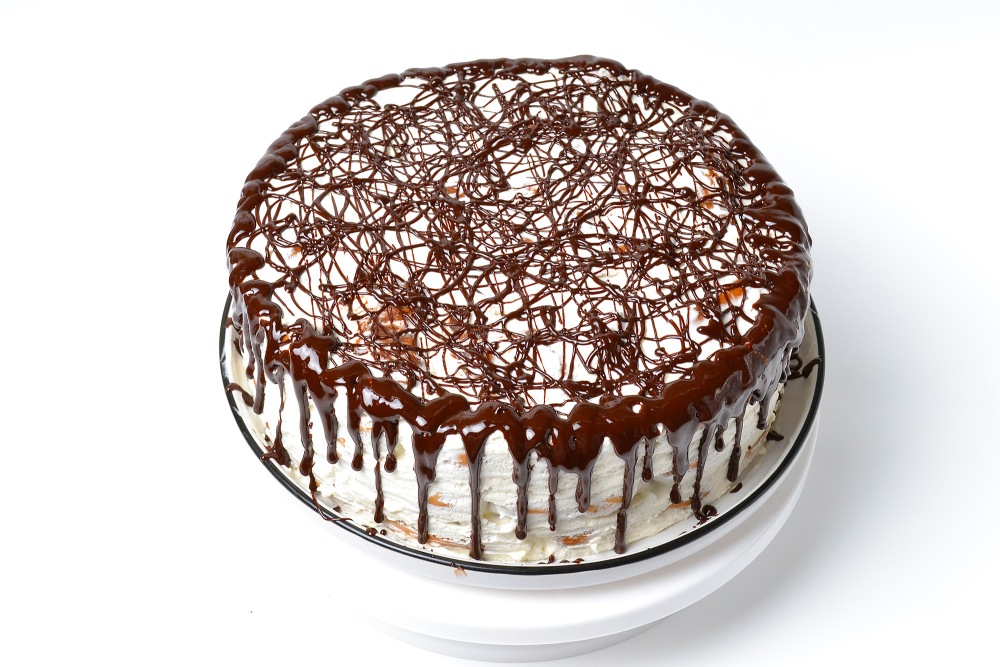
Step 23
Decorate the cake with chocolate by cutting off the spout of the pastry bag to a height of about 1.5-2 mm. You can also arrange berries and other decorative elements.
-
Step 24
Place the cake in the refrigerator for at least 30-40 minutes so that the chocolate hardens well. Then you can cut it into pieces and serve. Enjoy your tea!
📌 For other proven recipes for CAKES WITH SOURCE CREAM, SEE 👉🏻 HERE