
Step 1
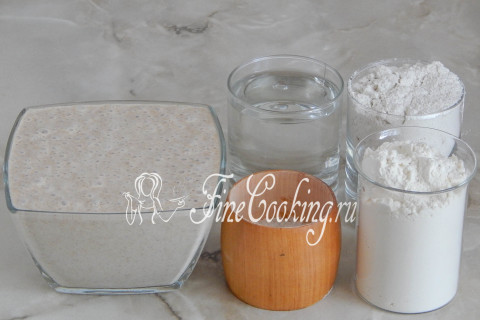
To make homemade wheat-rye bread without yeast, we need ready-made rye sourdough with 100% moisture, rye flour (any flour will do — wallpaper, peeled or sifted), wheat flour (I took first grade), water and salt.
Step 2
Experienced bakers write that the amount of starter should correspond to the amount of flour used in making bread. I have 600 grams of sourdough and the same amount of flour. Pour the starter into a large bowl (we have it at room temperature, ready to use).
Step 3

Add 340 grams of warm water — I don’t measure the temperature, I just test it with my finger. It should be pleasantly warm, the water should never be hot. Mix everything.
Step 4

Now sift 2 types of flour and salt into the diluted starter.
Step 5
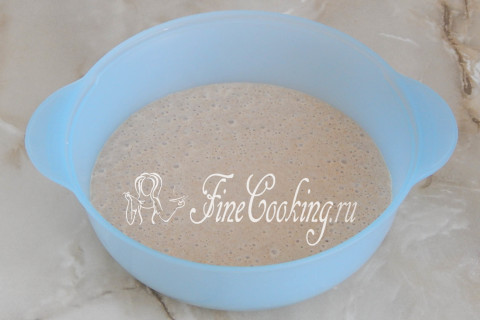
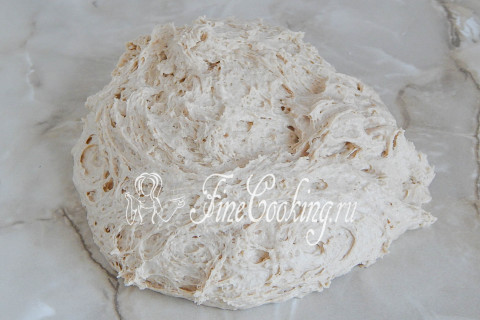
Knead the dough for a short time — you want the flour to be moistened and there are no lumps of flour. The dough turns out sticky — this is normal for rye. The consistency is not very tight — I deliberately did this so that the bread would not be too dense. It is most convenient to knead the dough by slightly moistening your hands with water.
Step 6
We cover the bowl with cling film, in which we make many punctures with a toothpick (this way the dough will breathe, but will not dry out). The dough should be allowed to rest in a warm place for half an hour. Now I’ll tell you how I create heat: I turn the oven on to maximum for literally a couple of minutes, then turn it off. Place the dough in a bowl on a wooden cutting board and place it in the oven. At first it’s quite warm, so I keep the door open, then close it when my hand feels pleasantly warm. The dough rises in 30 minutes. The photo may not clearly show how well the dough has risen, so look further.
Step 7
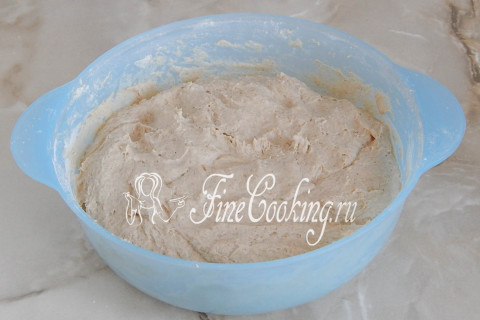
We transfer the dough to the work surface — here you can clearly see how bubbly and porous it is. Now you need to knead it thoroughly. The dough is very sticky, but I don’t use additional flour to avoid clogging it. A scraper will help a lot here (I forgot to take a photo, but I think you know what it looks like). The kneading lasts approximately 5-7 minutes.
Step 8
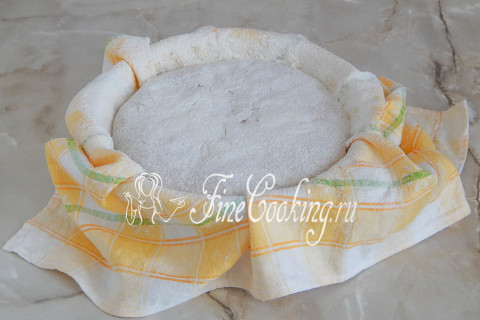
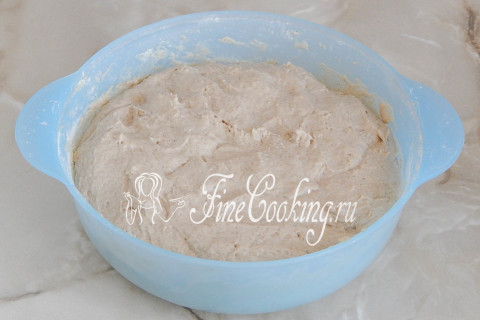
Next we send the dough for proofing — decide for yourself how and in what way. In this case, I decided to bake the hearth bread on a baking sheet, so my dough rested in a proofing basket, which I lined with a natural towel and generously sprinkled with wheat flour. No basket — use a suitable bowl or pan. If you do not sprinkle both the towel and the dough, it will stick tightly to the fabric. Cover the top of the dough with a towel. If you bake bread in a pan, simply grease it with butter. Leave the dough in a warm place until the dough has doubled in size.
Step 9
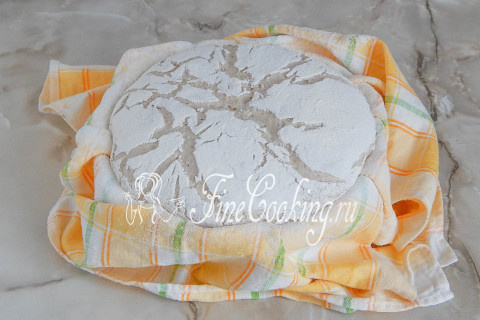
This is what the dough looked like after 2.5 hours — it had risen perfectly. And without a gram of yeast! Use a brush to shake off excess flour.
Step 10
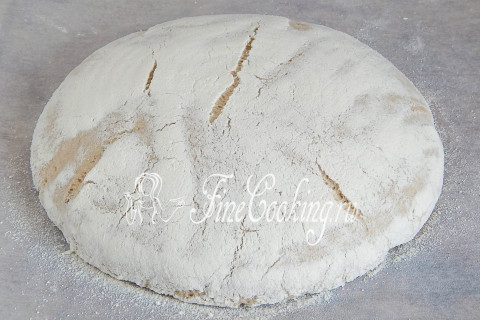
We transfer the future bread (if you bake with a hearth, like me) onto parchment paper. From the proofing pan, this is done by simply but gently turning. I also removed the excess flour with a brush, as it turned out to be a rather thick layer. Half an hour before baking the bread, turn on the oven (250 degrees) with a baking sheet to warm up, placing a deep bowl with boiling water at the very bottom. This is a steam bath that will help us rise the bread for the first 15 minutes.
Step 11
So, carefully transfer the workpiece along with the paper onto a hot baking sheet (it was heated in the oven). We bake the bread for the first 15 minutes at 250 degrees for steam (there is a pan with boiling water at the bottom of the oven). I also create steam by simply pouring water from a glass (about 100 ml) onto the bottom of the hot oven. Then remove the steam and bake the bread until ready for another 40 minutes at 190-200 degrees. We check the readiness of our bread by tapping on the crust — the sound should be as if there is emptiness inside. If you're not sure, you can also pierce the bread with a wooden skewer, which should come out clean.
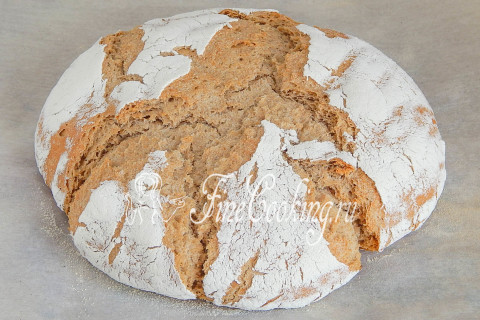
Step 12
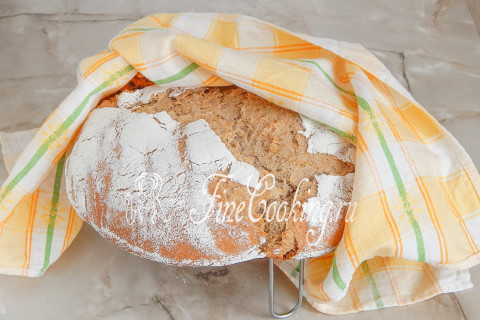
Cool the finished bread on a wire rack, then wrap it in a towel made of natural fabric. This is necessary so that the crust is not oaky. Surely you will say that the bread is cracked. Yes, I know. But this is due to the fact that the dough is not dense and I baked it not in a mold, but on a baking sheet. For me he is the most beautiful!
Step 13
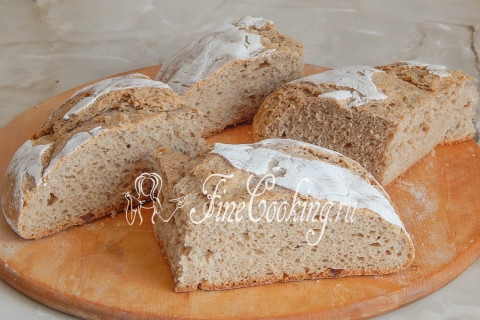
My handsome guy turned out to be very big — 1 kg 200 grams. You can make 2 600 gram loaves from this amount of ingredients, or simply halve the proportions to make 1 loaf.
Step 14
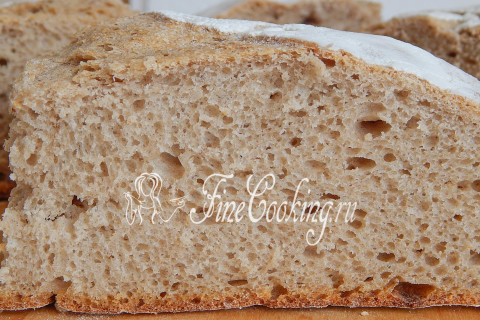
Just look at the crumb! I cut myself a piece, spread it with butter and milk… Here it is — HAPPINESS!